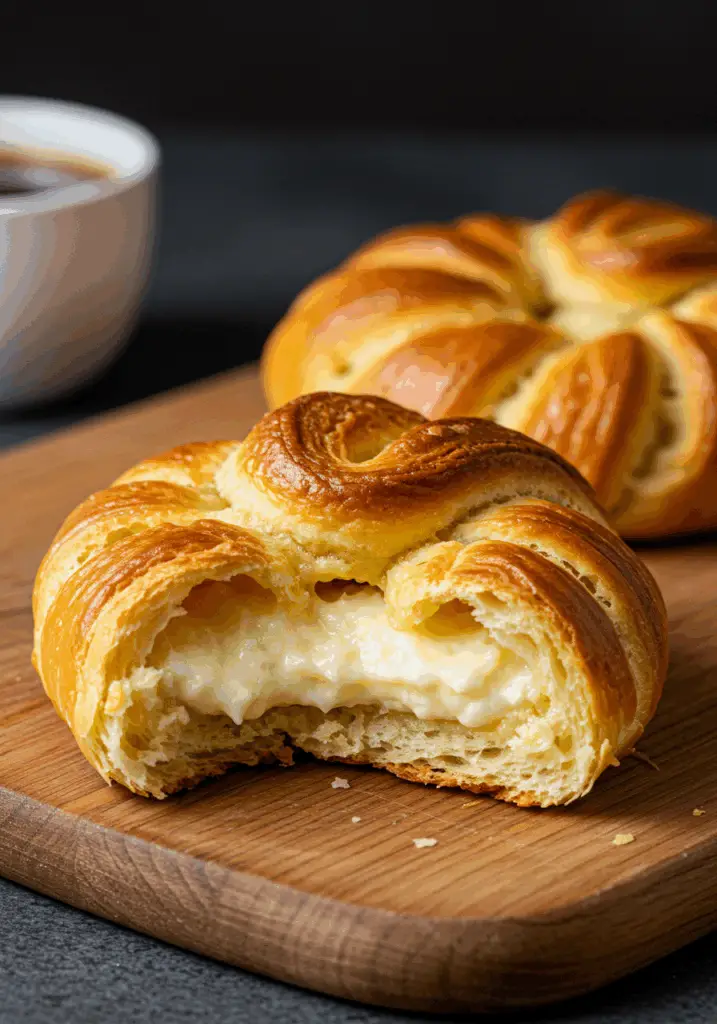
There’s nothing quite like a warm, flaky cheese Danish straight from the oven. These Homemade Cheese Danishes are buttery, slightly sweet, and filled with a rich cream cheese center that melts in your mouth. Whether you’re planning a weekend brunch or just want a bakery-style treat at home, this easy recipe brings all the indulgence without the fuss.
Want recipes like this delivered straight to your inbox? Subscribe now to get the latest culinary creations you’ll love.
Why You’ll Love This Recipe
Bakery-Style at Home – Tastes like it came from your favorite café.
Easy to Make – Especially simple when using store-bought puff pastry.
Versatile – Add fruit, jams, or chocolate to switch up the flavors.
Make-Ahead Friendly – Prep in advance and bake when ready.
Kid-Approved – Sweet, creamy, and fun to eat!
Ingredients You’ll Need
For the Pastry:
- 1 sheet puff pastry, thawed (from frozen, about 9×9 inches)
- 1 egg (for egg wash)
- 1 tbsp water
For the Cheese Filling:
- 6 oz cream cheese, softened
- ¼ cup granulated sugar
- 1 tsp lemon juice
- ½ tsp vanilla extract
- Pinch of salt
Optional Toppings & Variations:
- Fruit preserves (strawberry, apricot, raspberry)
- Fresh berries (blueberries, raspberries, sliced strawberries)
- Mini chocolate chips or Nutella
- Powdered sugar for dusting
For the Glaze (Optional):
- ½ cup powdered sugar
- 1–2 tbsp milk
- ¼ tsp vanilla extract
Tools You’ll Need
- Baking sheet
- Parchment paper
- Mixing bowl
- Hand mixer or whisk
- Pastry brush
- Knife or pizza cutter
Step-by-Step Instructions
Step 1: Preheat & Prep
Preheat your oven to 400°F (200°C).
Line a baking sheet with parchment paper.
In a small bowl, beat the egg with 1 tbsp water to make the egg wash. Set aside.
Step 2: Make the Cheese Filling
In a mixing bowl, combine softened cream cheese, granulated sugar, lemon juice, vanilla extract, and a pinch of salt.
Beat until smooth and creamy using a hand mixer or whisk.
Step 3: Prepare the Puff Pastry
Lightly flour your surface and unfold the thawed puff pastry sheet.
Cut into 4 or 6 equal squares, depending on your desired size.
Use a knife to score a smaller square inside each pastry square (without cutting all the way through). This helps the center rise less and hold the filling better.
Step 4: Fill & Fold
Add about 1 tablespoon of cheese filling in the center of each pastry square.
Optionally, add a small spoonful of fruit preserves or a few fresh berries on top of the filling.
Fold the corners slightly in toward the center, or leave them open for a classic look.
Step 5: Brush & Bake
Brush the edges of the pastry with the egg wash.
Place the Danishes on the prepared baking sheet, spacing them about 2 inches apart.
Bake for 15–18 minutes, or until the pastries are puffed and golden brown.
Step 6: Cool & Glaze
Let the Danishes cool for 5–10 minutes on the baking sheet.
For the glaze, mix powdered sugar, milk, and vanilla extract in a small bowl until smooth.
Drizzle over warm (not hot) Danishes for a beautiful finish.
Tips for the Best Homemade Cheese Danishes
Thaw Puff Pastry Properly – Let it thaw in the fridge overnight or for 30-40 minutes at room temp.
Keep Everything Cold – Cold dough puffs better in the oven.
Don’t Overfill – A little filling goes a long way and prevents overflow.
Use a Pastry Brush – Egg wash gives a golden, shiny finish.
Cool Before Glazing – Glazing too early will melt it into the pastry.
Serving Suggestions
Brunch Platter – Serve alongside fruit salad, eggs, and coffee.
Afternoon Tea – Pair with herbal tea or a warm latte.
Dessert Tray – Offer with cookies, mini cakes, or tarts.
Grab-and-Go Breakfast – Perfect with a smoothie or yogurt.
How to Store & Reheat
Storing:
Room Temp: Store in an airtight container for up to 2 days.
Refrigerate: Keep for up to 4 days in the fridge.
Freezing:
Freeze baked and cooled Danishes in a freezer-safe container for up to 2 months.
Reheat in a 350°F (175°C) oven for 10 minutes or until warmed through.
Reheating:
Oven: Best method for crisping the pastry—reheat at 300°F for 8–10 minutes.
Microwave: Use short bursts (10–15 seconds) but note the pastry may soften.
Frequently Asked Questions
- Can I make these ahead of time?
Yes! Assemble and refrigerate overnight, then bake fresh in the morning. - Can I use homemade pastry dough?
Absolutely. If you enjoy making pastry from scratch, go for it! - What other fillings work well?
Try sweetened ricotta, mascarpone, or a combination of cream cheese and pumpkin puree. - Can I make them savory?
Yes! Skip the sugar and use spinach, mushrooms, or herbs for a savory twist. - How do I keep the bottom from getting soggy?
Use parchment paper and avoid overfilling. Baking on a preheated baking sheet can also help.
Final Thoughts
Homemade Cheese Danishes are the perfect mix of buttery pastry and creamy filling. They’re easy to make, endlessly adaptable, and absolutely irresistible. Whether you’re baking for a weekend brunch, a cozy family breakfast, or just treating yourself, these Danishes are sure to impress.
Try this recipe and let the flaky, sweet goodness speak for itself. Don’t forget to share your results and leave a review!
Preparation Time: 10 minutes
Cooking Time: 18 minutes
Cuisine: American (inspired by Danish pastry tradition)
Nutritional Information (Per Danish, approx.):
Calories: 260 | Protein: 4g | Carbohydrates: 24g | Fat: 16g | Fiber: 1g | Sodium: 190mg

Homemade Cheese Danishes
- Total Time: 28 minutes
Description
There’s nothing quite like a warm, flaky cheese Danish straight from the oven. These Homemade Cheese Danishes are buttery, slightly sweet, and filled with a rich cream cheese center that melts in your mouth. Whether you’re planning a weekend brunch or just want a bakery-style treat at home, this easy recipe brings all the indulgence without the fuss.
Want recipes like this delivered straight to your inbox? Subscribe now to get the latest culinary creations you’ll love.
Ingredients
For the Pastry:
-
1 sheet puff pastry, thawed (from frozen, about 9x9 inches)
-
1 egg (for egg wash)
-
1 tbsp water
For the Cheese Filling:
-
6 oz cream cheese, softened
-
¼ cup granulated sugar
-
1 tsp lemon juice
-
½ tsp vanilla extract
-
Pinch of salt
Optional Toppings & Variations:
-
Fruit preserves (strawberry, apricot, raspberry)
-
Fresh berries (blueberries, raspberries, sliced strawberries)
-
Mini chocolate chips or Nutella
-
Powdered sugar for dusting
For the Glaze (Optional):
-
½ cup powdered sugar
-
1–2 tbsp milk
-
¼ tsp vanilla extract
Instructions
Step 1: Preheat & Prep
Preheat your oven to 400°F (200°C).
Line a baking sheet with parchment paper.
In a small bowl, beat the egg with 1 tbsp water to make the egg wash. Set aside.
Step 2: Make the Cheese Filling
In a mixing bowl, combine softened cream cheese, granulated sugar, lemon juice, vanilla extract, and a pinch of salt.
Beat until smooth and creamy using a hand mixer or whisk.
Step 3: Prepare the Puff Pastry
Lightly flour your surface and unfold the thawed puff pastry sheet.
Cut into 4 or 6 equal squares, depending on your desired size.
Use a knife to score a smaller square inside each pastry square (without cutting all the way through). This helps the center rise less and hold the filling better.
Step 4: Fill & Fold
Add about 1 tablespoon of cheese filling in the center of each pastry square.
Optionally, add a small spoonful of fruit preserves or a few fresh berries on top of the filling.
Fold the corners slightly in toward the center, or leave them open for a classic look.
Step 5: Brush & Bake
Brush the edges of the pastry with the egg wash.
Place the Danishes on the prepared baking sheet, spacing them about 2 inches apart.
Bake for 15–18 minutes, or until the pastries are puffed and golden brown.
Step 6: Cool & Glaze
Let the Danishes cool for 5–10 minutes on the baking sheet.
For the glaze, mix powdered sugar, milk, and vanilla extract in a small bowl until smooth.
Drizzle over warm (not hot) Danishes for a beautiful finish.
Notes
Thaw Puff Pastry Properly – Let it thaw in the fridge overnight or for 30-40 minutes at room temp.
Keep Everything Cold – Cold dough puffs better in the oven.
Don’t Overfill – A little filling goes a long way and prevents overflow.
Use a Pastry Brush – Egg wash gives a golden, shiny finish.
Cool Before Glazing – Glazing too early will melt it into the pastry.
- Prep Time: 10 minutes
- Cook Time: 18 minutes
- Cuisine: American (inspired by Danish pastry tradition)