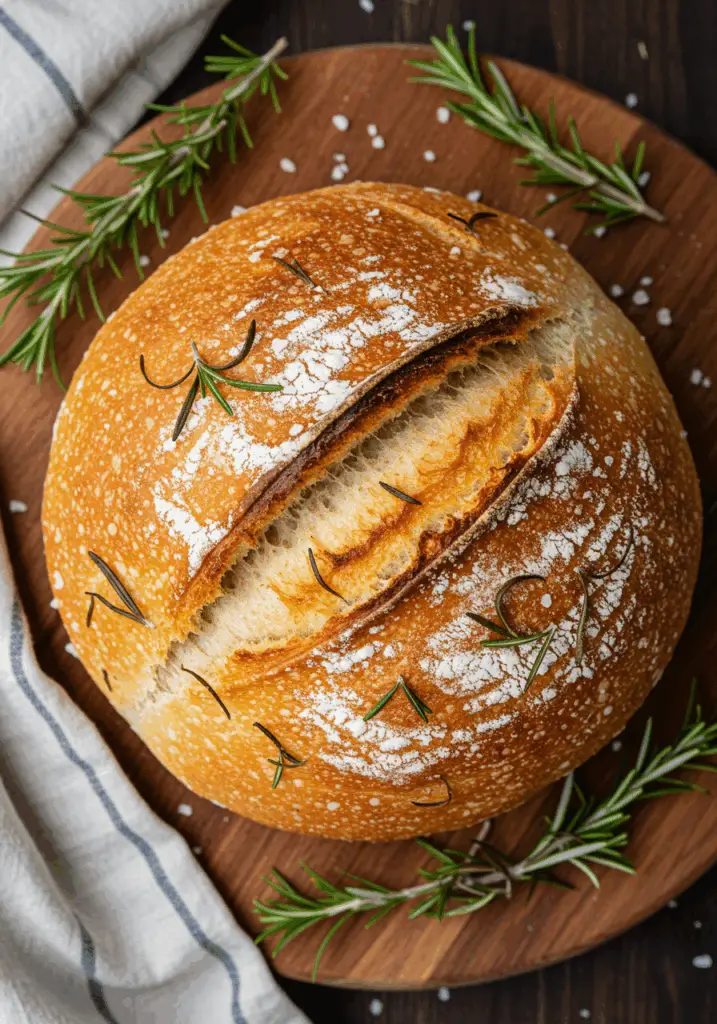
There’s nothing quite like the smell of freshly baked bread wafting through your kitchen—and this Rustic No Knead Rosemary Garlic Bread delivers all that delicious, homemade goodness with minimal effort. With its crispy golden crust, chewy interior, and savory blend of garlic and rosemary, this artisan-style bread is perfect for soups, sandwiches, or simply slathering with butter.
Craving more easy homemade breads? Subscribe now and get bakery-worthy recipes straight to your inbox.
Why You’ll Love This Recipe
No Kneading Required – Let time do the work for you.
Flavor-Packed – Fresh rosemary and garlic infuse every bite.
Minimal Ingredients – Simple pantry staples turn into gourmet bread.
Perfect Crust – Crispy outside, soft and airy inside.
Make Ahead – Dough rests overnight, so you can bake fresh bread the next day.
Ingredients You’ll Need
- 3 cups all-purpose flour (plus more for dusting)
- 1½ tsp salt
- ½ tsp instant yeast
- 1½ cups warm water (about 110°F)
- 2 tbsp fresh rosemary, finely chopped
- 3 cloves garlic, minced
- 1 tbsp olive oil (for garlic sauté)
- Extra flour or cornmeal for dusting
Tools You’ll Need
- Large mixing bowl
- Wooden spoon or spatula
- Cast iron Dutch oven (or any oven-safe pot with lid)
- Parchment paper
- Kitchen towel or plastic wrap
- Skillet (for garlic)
Step-by-Step Instructions
Step 1: Sauté the Garlic
- In a small skillet, heat olive oil over medium heat.
- Add minced garlic and sauté for 1–2 minutes until fragrant and just golden (don’t burn it).
- Remove from heat and let cool slightly.
Step 2: Mix the Dough
4. In a large bowl, combine flour, salt, and instant yeast.
5. Add the sautéed garlic (with oil) and chopped rosemary.
6. Pour in warm water and stir with a wooden spoon or spatula until a shaggy, sticky dough forms.
7. Cover the bowl tightly with plastic wrap or a damp kitchen towel.
Step 3: Let It Rise
8. Let the dough rest at room temperature for 12 to 18 hours.
9. It should double in size and look bubbly and airy.
Step 4: Shape the Dough
10. Generously flour a surface and turn out the dough.
11. With floured hands, fold the dough over itself a few times and shape it into a round loaf.
12. Place on a sheet of parchment paper and dust the top with a little flour or cornmeal.
13. Cover loosely with a towel and let rest for 30–45 minutes.
Step 5: Preheat the Oven
14. While the dough rests, place your Dutch oven (with the lid on) into the oven.
15. Preheat to 450°F (232°C) for at least 30 minutes.
Step 6: Bake the Bread
16. Carefully remove the hot pot from the oven.
17. Use the parchment paper to transfer the dough into the Dutch oven.
18. Cover and bake for 30 minutes.
19. Uncover and bake for an additional 10–15 minutes until the crust is deep golden brown.
Step 7: Cool & Serve
20. Remove the bread from the pot and let it cool on a wire rack for at least 20 minutes before slicing.
21. Serve with olive oil, butter, or alongside your favorite soup.
Tips for the Best Rustic Bread
Use Fresh Herbs – Fresh rosemary adds bright, earthy flavor.
Let It Rise Overnight – A long rise improves flavor and texture.
Hot Pot = Crispy Crust – Preheating the Dutch oven is key to that crackly exterior.
Don’t Skip Cooling – Letting it rest after baking keeps the texture just right.
Customize It – Add olives, sun-dried tomatoes, or swap rosemary for thyme.
Serving Suggestions
Soup Companion – Perfect with tomato soup, lentil stew, or creamy chowder.
Avocado Toast – A rustic base for your favorite toppings.
Grilled Cheese – Take sandwiches to the next level.
Simple Snack – Just tear and dip in olive oil with balsamic vinegar.
How to Store & Reheat
Room Temperature:
Wrap in a kitchen towel or paper bag and store up to 2 days.
Freeze:
Slice and freeze in a zip-top bag for up to 2 months. Toast straight from frozen.
Reheat:
Wrap in foil and warm in a 350°F oven for 10–12 minutes.
Frequently Asked Questions
1. Can I use dried rosemary?
Yes, use 1 tbsp dried rosemary instead of fresh, but fresh gives better flavor.
2. What if I don’t have a Dutch oven?
Use any oven-safe pot with a lid or bake uncovered on a preheated pizza stone (add a pan of water for steam).
3. Can I make this gluten-free?
Try a 1:1 gluten-free flour blend, but texture may vary slightly.
4. Is instant yeast the same as active dry yeast?
Not exactly. If using active dry yeast, dissolve it in warm water first and let sit for 5 minutes before adding to flour.
Final Thoughts
Rustic No Knead Rosemary Garlic Bread is the ultimate hands-off recipe that delivers bakery-quality results every time. With its rich aroma, crunchy crust, and herby garlic flavor, it’s hard to believe how little effort it takes. Once you make it, you’ll never go back to store-bought bread again.
Try it out and tell me how it goes! Leave a comment and tag your loaf online—I’d love to see your rustic masterpiece.
Preparation Time: 10 minutes
Rising Time: 12–18 hours
Baking Time: 45 minutes
Cuisine: American
Nutritional Information (Per Slice, ~10 slices):
Calories: 170 | Protein: 5g | Carbohydrates: 32g | Fat: 2g | Fiber: 1g | Sodium: 290mg

Rustic No Knead Rosemary Garlic Bread
- Total Time: 10 minutes
Description
There’s nothing quite like the smell of freshly baked bread wafting through your kitchen—and this Rustic No Knead Rosemary Garlic Bread delivers all that delicious, homemade goodness with minimal effort. With its crispy golden crust, chewy interior, and savory blend of garlic and rosemary, this artisan-style bread is perfect for soups, sandwiches, or simply slathering with butter.
Craving more easy homemade breads? Subscribe now and get bakery-worthy recipes straight to your inbox.
Ingredients
-
3 cups all-purpose flour (plus more for dusting)
-
1½ tsp salt
-
½ tsp instant yeast
-
1½ cups warm water (about 110°F)
-
2 tbsp fresh rosemary, finely chopped
-
3 cloves garlic, minced
-
1 tbsp olive oil (for garlic sauté)
-
Extra flour or cornmeal for dusting
Instructions
Step 1: Sauté the Garlic
-
In a small skillet, heat olive oil over medium heat.
-
Add minced garlic and sauté for 1–2 minutes until fragrant and just golden (don’t burn it).
-
Remove from heat and let cool slightly.
Step 2: Mix the Dough
4. In a large bowl, combine flour, salt, and instant yeast.
5. Add the sautéed garlic (with oil) and chopped rosemary.
6. Pour in warm water and stir with a wooden spoon or spatula until a shaggy, sticky dough forms.
7. Cover the bowl tightly with plastic wrap or a damp kitchen towel.
Step 3: Let It Rise
8. Let the dough rest at room temperature for 12 to 18 hours.
9. It should double in size and look bubbly and airy.
Step 4: Shape the Dough
10. Generously flour a surface and turn out the dough.
11. With floured hands, fold the dough over itself a few times and shape it into a round loaf.
12. Place on a sheet of parchment paper and dust the top with a little flour or cornmeal.
13. Cover loosely with a towel and let rest for 30–45 minutes.
Step 5: Preheat the Oven
14. While the dough rests, place your Dutch oven (with the lid on) into the oven.
15. Preheat to 450°F (232°C) for at least 30 minutes.
Step 6: Bake the Bread
16. Carefully remove the hot pot from the oven.
17. Use the parchment paper to transfer the dough into the Dutch oven.
18. Cover and bake for 30 minutes.
19. Uncover and bake for an additional 10–15 minutes until the crust is deep golden brown.
Step 7: Cool & Serve
20. Remove the bread from the pot and let it cool on a wire rack for at least 20 minutes before slicing.
21. Serve with olive oil, butter, or alongside your favorite soup.
Notes
Use Fresh Herbs – Fresh rosemary adds bright, earthy flavor.
Let It Rise Overnight – A long rise improves flavor and texture.
Hot Pot = Crispy Crust – Preheating the Dutch oven is key to that crackly exterior.
Don’t Skip Cooling – Letting it rest after baking keeps the texture just right.
Customize It – Add olives, sun-dried tomatoes, or swap rosemary for thyme.
- Prep Time: 10 minutes
- Cuisine: American