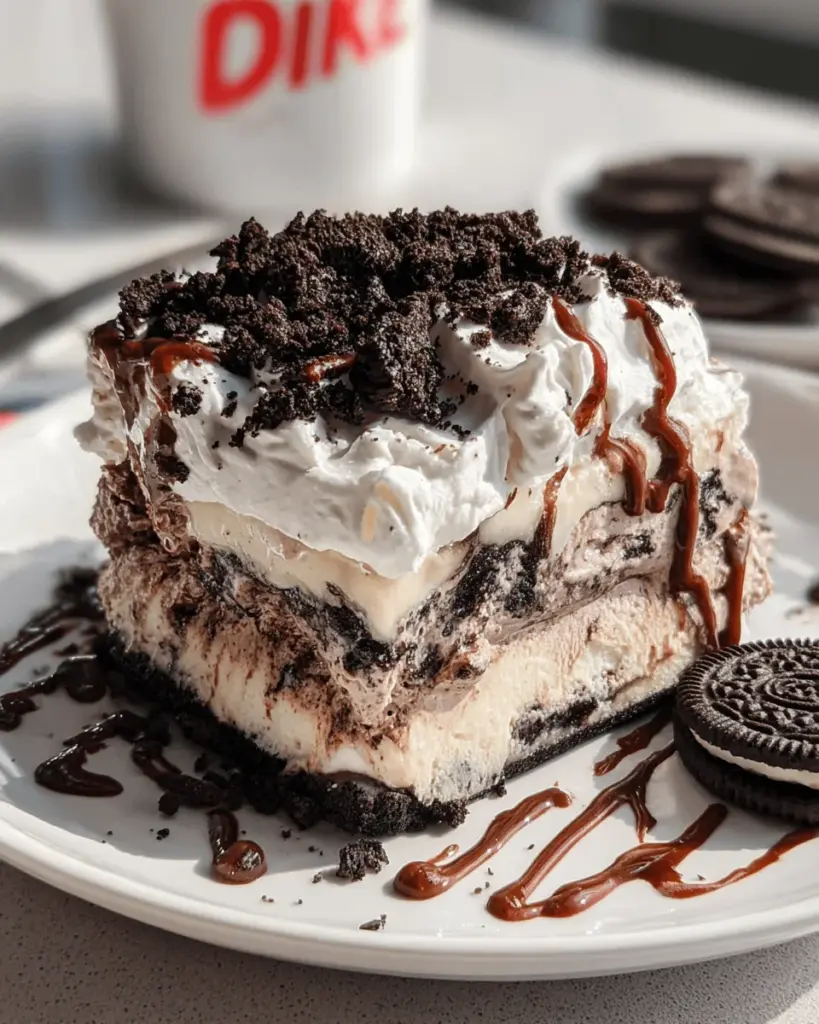
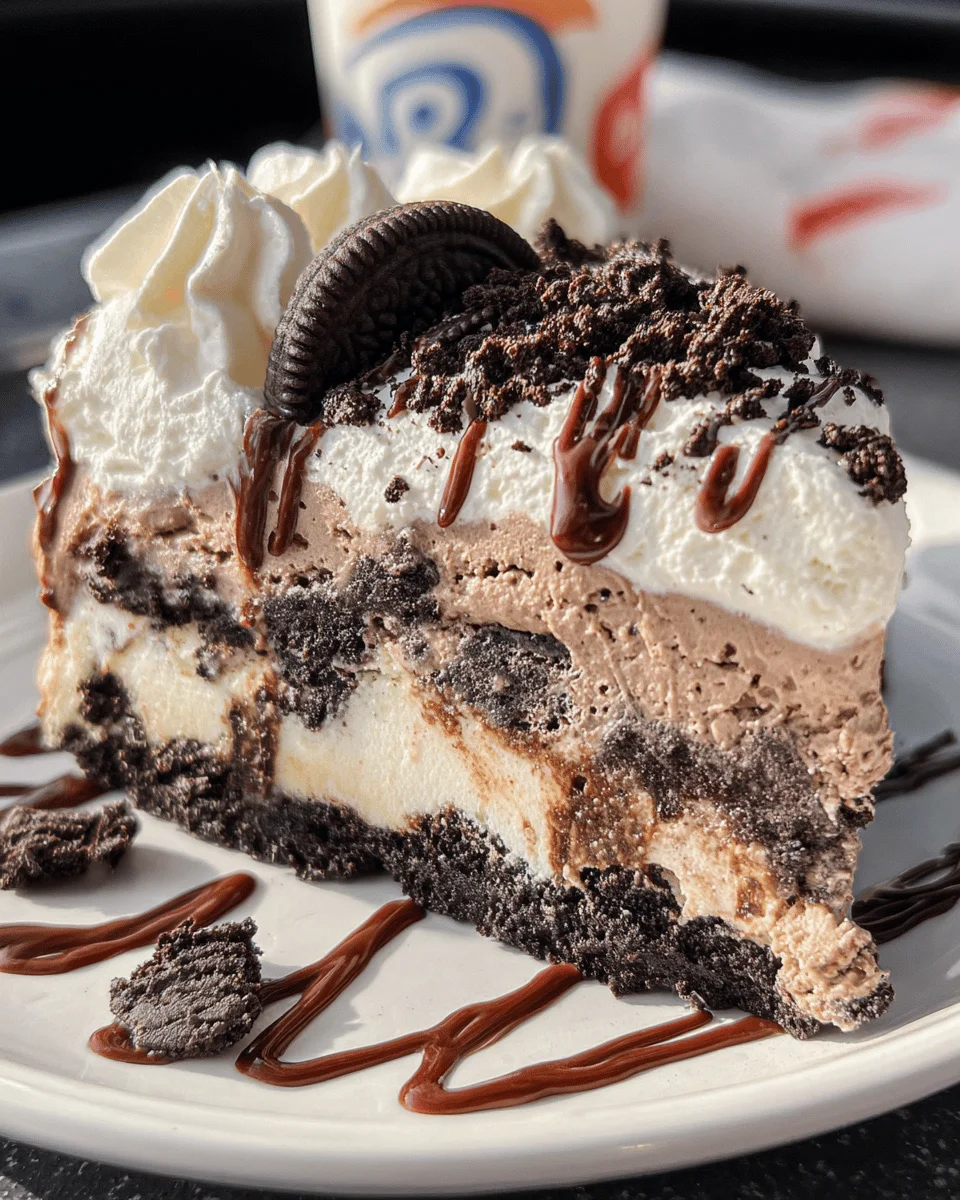
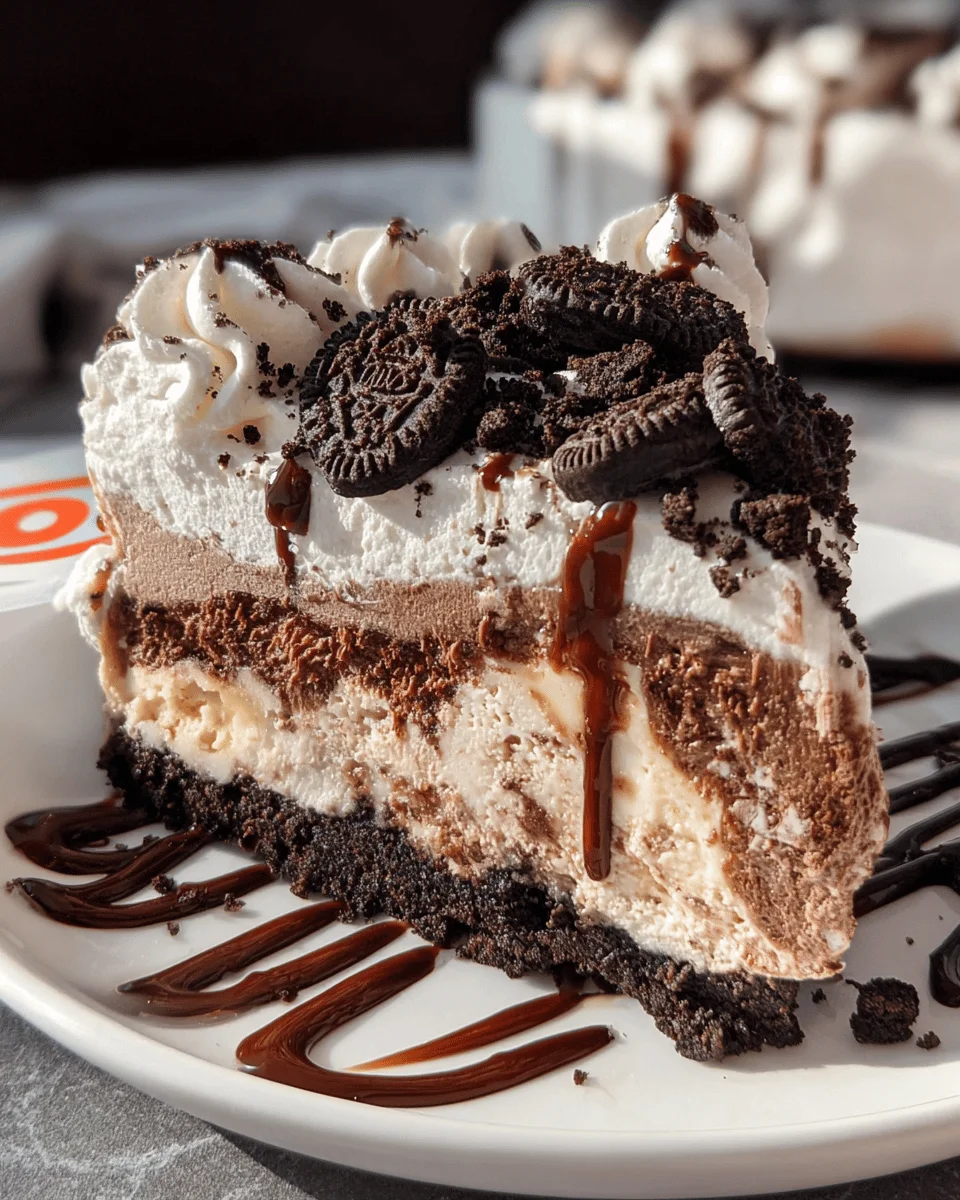
Dairy Queen Copycat Oreo Cookie Ice Cream Cake is the perfect dessert for any celebration or gathering. This delightful treat replicates the iconic soft serve slice, allowing you to enjoy its rich flavors in the comfort of your home. Whether you’re hosting a birthday party, family reunion, or simply craving something sweet, this cake serves as a showstopper that everyone will love. Plus, it’s easy to make and saves you money compared to store-bought options.
Why You’ll Love This Recipe
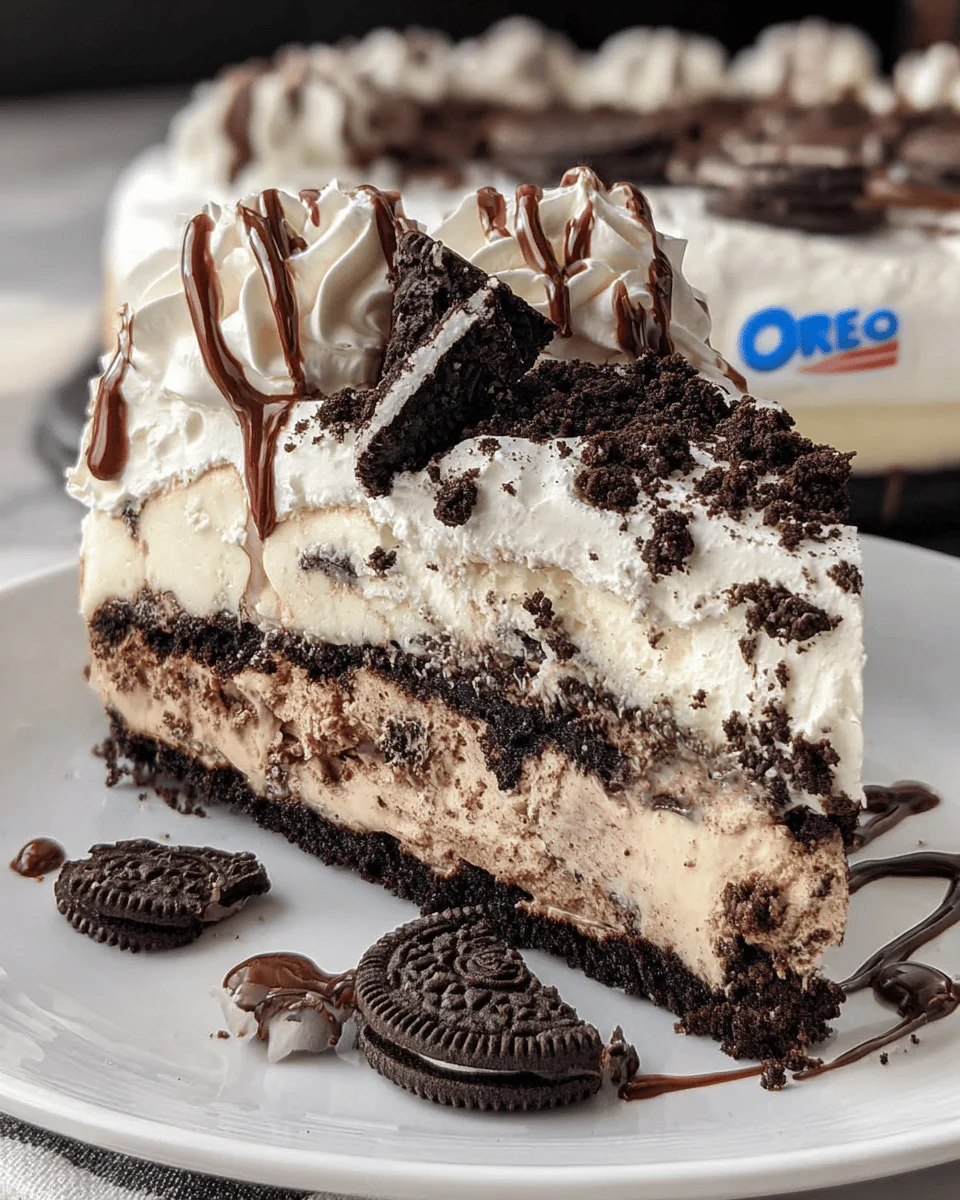
- Delicious Layers: Enjoy the rich combination of chocolate and cookies and cream ice cream layered with hot fudge and crunchy cookie crumbs.
- Easy to Assemble: This no-bake ice cream cake requires minimal effort, making it a great choice for bakers of all skill levels.
- Customizable: Feel free to add your favorite toppings or other mix-ins to make this cake uniquely yours.
- Perfect for Any Occasion: Whether it’s a birthday, holiday, or just a family gathering, this cake is sure to impress.
- Budget-Friendly: Making this delicious treat at home is more economical than purchasing it from a store.
Tools and Preparation
To create your Dairy Queen Copycat Oreo Cookie Ice Cream Cake, having the right tools on hand can make all the difference. Here’s a quick rundown of what you’ll need.
Essential Kitchen Tools
- Springform pan
- Mixing bowls
- Baking sheet
- Parchment paper
- Silicone spatula or offset spatula
- Stand mixer or handheld mixer
Why These Tools Matter
- Springform pan: This allows for easy removal of the ice cream cake without damaging its structure.
- Mixing bowls: Essential for combining ingredients efficiently and keeping your workspace organized.
- Silicone spatula: Perfect for spreading layers evenly and scraping every bit of goodness from bowls.
Ingredients
Dairy Queen Copycat Oreo Cookie Ice Cream Cake tastes just like the iconic soft serve slice. Easy to assemble at home and more economical than the store bought treat.
For the Ice Cream Layers
- 1 quart chocolate ice cream ((I used Great Value brand))
- 1 quart cookies and cream ice cream ((I used Great Value brand))
For the Fudge Layer
- 11.75 ounces container hot fudge sundae topping ((I used Smucker’s brand))
For the Cookie Crust
- 513 grams (or 1 lb 2.12 oz) Oreo cookies with filling
- ½ cup salted sweet cream butter (melted and cooled)
For the Whipped Frosting
- 2½ cups cold heavy cream
- 1½ cups powdered sugar
- 2 teaspoon clear vanilla flavoring
For Garnishing (Optional)
- Chocolate syrup (optional drizzle)
How to Make Dairy Queen Copycat Oreo Cookie Ice Cream Cake
Step 1: Prepare Your Pan
Line a 9-inch springform pan with plastic wrap. Place it in the freezer while you prepare the cookie layer.
Step 2: Preheat Your Oven
Heat your oven to 350°F and line a baking sheet with parchment paper.
Step 3: Make Cookie Crumbs
Add 25 crushed Oreo cookies to a small mixing bowl. Stir in the melted butter until well combined.
Step 4: Bake Cookie Crumbs
Spread the cookie mix evenly on the lined baking sheet. Bake for 7-8 minutes until fragrant. Allow them to cool completely before breaking into bite-sized pieces.
Step 5: Thaw Chocolate Ice Cream
While cookie crumbs are cooling, take out chocolate ice cream and let it thaw slightly for easier spreading.
Step 6: Layer Chocolate Ice Cream
After thawing for about 15-20 minutes, spread half of the chocolate ice cream into the bottom of the springform pan and up its sides. Return it to freeze for about 30 minutes to an hour.
Step 7: Add Hot Fudge Layer
Warm up your hot fudge in the microwave for about 20-25 seconds to soften it. Spread it evenly over the frozen chocolate ice cream layer using a spatula.
Step 8: Top with Cookie Crumbs
Sprinkle baked cookie crumbs over the hot fudge layer evenly before returning it back to freeze for another hour.
Step 9: Prepare Cookies & Cream Layer
Remove cookies and cream ice cream from freezer about 15-20 minutes before using so it can soften slightly. Mix in chopped Oreo pieces.
Step 10: Spread Cookies & Cream Ice Cream
Take out your springform pan from freezer; loosen edges if needed. Spread cookies and cream mixture on top of cookie crunch layer and return it back to freeze for at least 4-6 hours or overnight.
Step 11: Whip Frosting
Chill your mixing bowl in advance if using a stand mixer or metal bowl if using a handheld mixer. Once chilled, whip together heavy cream, powdered sugar, and vanilla until stiff peaks form—about 3-4 minutes.
Step 12: Frost Your Cake
Quickly remove your cake from freezer. Release springform pan’s outer portion and place cake onto serving plate. Frost sides and top with whipped frosting while it’s still firm.
Step 13: Decorate
Pipe decorations around edges using remaining whipped frosting in a piping bag fitted with a star tip. Top with remaining chopped Oreo cookies and drizzle with chocolate syrup if desired.
Step 14: Final Freeze
Place back into freezer until ready to serve! Enjoy your homemade Dairy Queen Copycat Oreo Cookie Ice Cream Cake!
How to Serve Dairy Queen Copycat Oreo Cookie Ice Cream Cake
Serving Dairy Queen Copycat Oreo Cookie Ice Cream Cake can elevate any gathering or celebration. Whether it’s a birthday, picnic, or a simple family dinner, presenting this delightful dessert in a few creative ways can enhance the experience.
Individual Slices
- Use a sharp knife to cut the cake into slices and serve each piece on a dessert plate. This allows everyone to have their own portion while showcasing the beautiful layers.
Ice Cream Sandwich Style
- For a fun twist, serve smaller slices between two soft cookies. This creates an ice cream sandwich that is easy to hold and enjoy, especially for kids.
Sundae Bar
- Set up a sundae bar with toppings like whipped cream, sprinkles, and additional crushed Oreo cookies. Let guests customize their servings for a personalized touch.
Elegant Plating
- For a more refined presentation, plate individual slices on a white dish and drizzle chocolate syrup artistically around the cake slice. Garnish with mint leaves for color.
Family Style
- Place the whole cake on the table and let guests help themselves. This casual approach encourages sharing and conversation.
How to Perfect Dairy Queen Copycat Oreo Cookie Ice Cream Cake
To achieve the perfect Dairy Queen Copycat Oreo Cookie Ice Cream Cake, consider these helpful tips that ensure your dessert turns out just right.
- Choose Quality Ingredients: Opt for high-quality ice creams and hot fudge toppings. The better the ingredients, the richer the flavor of your cake will be.
- Allow Thawing Time: Ensure your ice cream is slightly thawed before spreading. This makes it easier to layer without breaking apart.
- Chill Between Layers: After adding each layer, chill in the freezer for at least 30 minutes to maintain structure. This prevents melting and helps set each layer properly.
- Use Room Temperature Tools: When frosting the cake, use room temperature spatulas or utensils. This helps in achieving smooth edges when applying frosting.
- Decorate Last Minute: If you’re serving outdoors or in warm weather, decorate your cake just before serving to prevent melting or melting of decorations.
Best Side Dishes for Dairy Queen Copycat Oreo Cookie Ice Cream Cake
Pairing side dishes with your Dairy Queen Copycat Oreo Cookie Ice Cream Cake can create a balanced meal. Here are some delightful options to consider:
- Fresh Fruit Salad: A mix of seasonal fruits adds freshness and balances the richness of the cake.
- Chocolate Chip Cookies: Classic cookies complement the cake’s flavors and offer another sweet option for guests.
- Pineapple Upside Down Cake: This moist cake provides a contrasting texture and fruity flavor that pairs well with ice cream desserts.
- Brownie Bites: Chewy brownies are always a hit and make for an indulgent combination with ice cream.
- Mini Cheesecakes: Individual cheesecakes provide creamy goodness that nicely contrasts with the ice cream cake.
- Vanilla Pudding Cups: Light vanilla pudding cups add a soft texture that works well alongside your frozen treat.
Common Mistakes to Avoid
When making the Dairy Queen Copycat Oreo Cookie Ice Cream Cake, avoiding common mistakes can help ensure your dessert turns out perfectly.
- Timing is crucial: Allowing ice cream to thaw too long can lead to a soupy mess. Thaw it just enough to spread easily.
- Proper cooling of cookie crumbs: Not letting the cookie crumbs cool completely before adding them can create a soggy layer. Make sure they are fully cooled and broken into small pieces.
- Layering issues: Skipping the freezing time between layers can cause them to blend together. Be patient and freeze each layer as instructed.
- Overmixing whipped cream: Whipping the cream for too long can result in butter instead of a smooth frosting. Beat until you reach stiff peaks, then stop.
- Ignoring storage tips: Not storing the cake correctly can lead to freezer burn. Use airtight containers or wrap it tightly in plastic wrap.
Refrigerator Storage
- item Store in an airtight container for up to 3 days.
- item Keep at the back of the fridge where it’s coldest.
Freezing Dairy Queen Copycat Oreo Cookie Ice Cream Cake
- item The cake can be frozen for up to 2 months if well-wrapped.
- item Use plastic wrap followed by aluminum foil for best protection against freezer burn.
Reheating Dairy Queen Copycat Oreo Cookie Ice Cream Cake
- Oven: Not recommended, as this dessert is best served cold.
- Microwave: Use very low power for a few seconds if needed, but avoid melting the ice cream.
- Stovetop: Again, not suitable as it’s meant to be enjoyed frozen.
Frequently Asked Questions
What is Dairy Queen Copycat Oreo Cookie Ice Cream Cake?
This cake replicates the beloved soft serve ice cream treat with layers of chocolate and cookies & cream ice cream, hot fudge, and cookie crumbles.
How should I customize my Dairy Queen Copycat Oreo Cookie Ice Cream Cake?
Feel free to add different flavors of ice cream or mix in various candies or toppings according to your preference.
Can I make this cake ahead of time?
Yes! You can prepare this cake a day or two in advance. Just keep it well-covered in the freezer until you’re ready to serve.
How do I store leftovers?
Store any leftover cake in an airtight container in the freezer for up to two months to maintain its taste and texture.
Conclusion
The Dairy Queen Copycat Oreo Cookie Ice Cream Cake is a delightful treat that brings joy with every slice. Its easy assembly and customizable nature make it perfect for any occasion. Give it a try, and feel free to get creative with your favorite flavors or toppings!
Dairy Queen Copycat Oreo Cookie Ice Cream Cake
- Total Time: 38 minutes
- Yield: Serves approximately 12 people 1x
Description
Indulge in the delightful Dairy Queen Copycat Oreo Cookie Ice Cream Cake, a homemade version of the beloved soft serve treat that’s perfect for any occasion. This no-bake dessert features luscious layers of chocolate and cookies & cream ice cream, rich hot fudge, and crunchy cookie crumbles, all coming together to create an unforgettable flavor experience. Whether you’re celebrating a birthday, hosting a family gathering, or just craving something sweet, this cake is sure to impress. Plus, it’s budget-friendly and customizable—feel free to add your favorite toppings or mix-ins!
Ingredients
- 1 quart chocolate ice cream
- 1 quart cookies and cream ice cream
- 11.75 ounces hot fudge sundae topping
- 513 grams Oreo cookies
- ½ cup salted sweet cream butter (melted)
- 2½ cups cold heavy cream
- 1½ cups powdered sugar
- 2 teaspoons clear vanilla flavoring
Instructions
- Line a springform pan with plastic wrap and freeze.
- Preheat oven to 350°F. Mix crushed Oreo cookies with melted butter; spread on baking sheet and bake for 7-8 minutes.
- Thaw chocolate ice cream slightly, then spread half into the pan. Freeze for 30-60 minutes.
- Warm hot fudge, spread over chocolate layer, then top with cookie crumbs; freeze for another hour.
- Soften cookies & cream ice cream, mix in chopped Oreos, and layer on top of cookie crust; freeze for at least 4-6 hours or overnight.
- Whip heavy cream with powdered sugar and vanilla until stiff peaks form; frost the cake.
- Decorate as desired and freeze until ready to serve.
- Prep Time: 30 minutes
- Cook Time: 8 minutes
- Category: Dessert
- Method: No-bake
- Cuisine: American
Nutrition
- Serving Size: 1 slice (135g)
- Calories: 376
- Sugar: 36g
- Sodium: 190mg
- Fat: 24g
- Saturated Fat: 14g
- Unsaturated Fat: 8g
- Trans Fat: 0g
- Carbohydrates: 37g
- Fiber: 1g
- Protein: 4g
- Cholesterol: 66mg