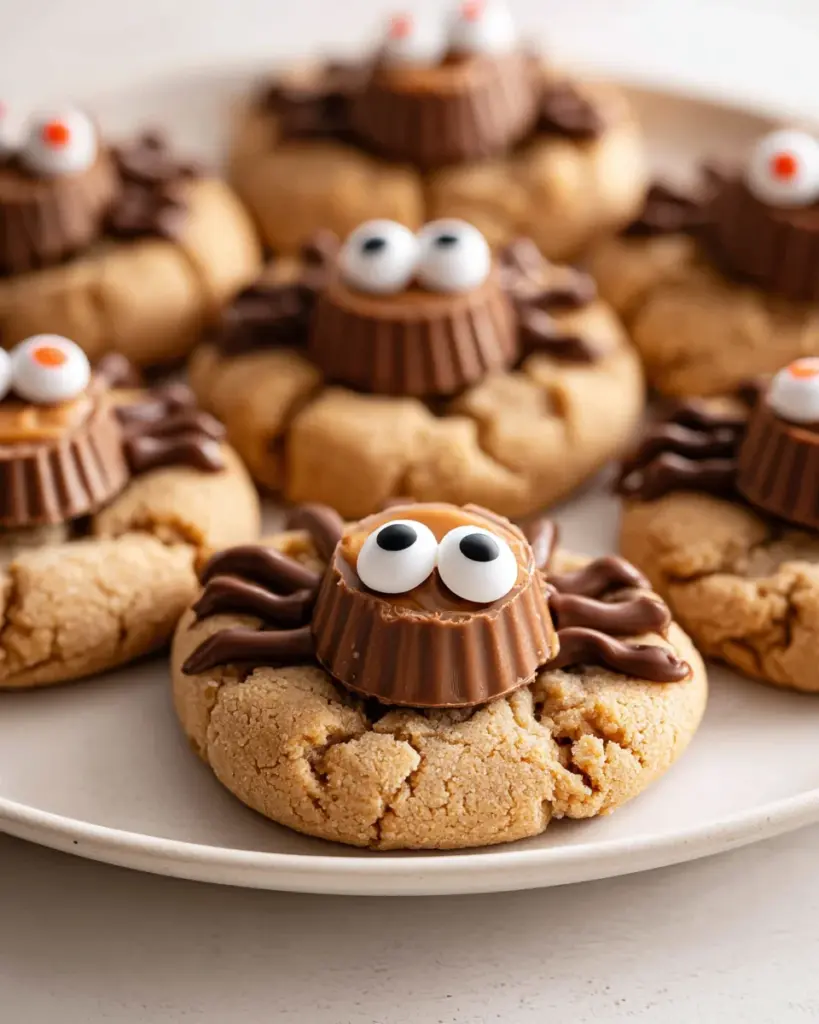
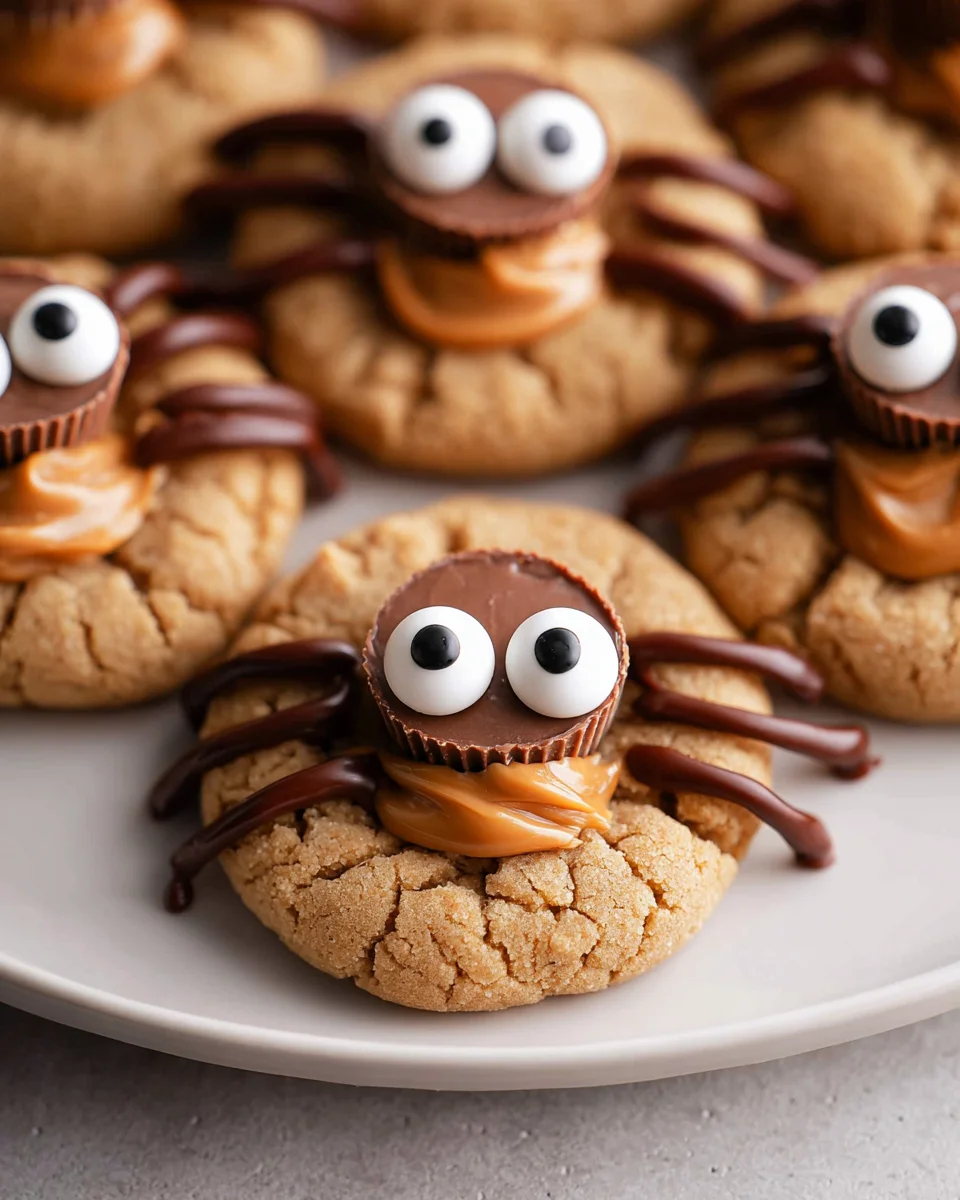
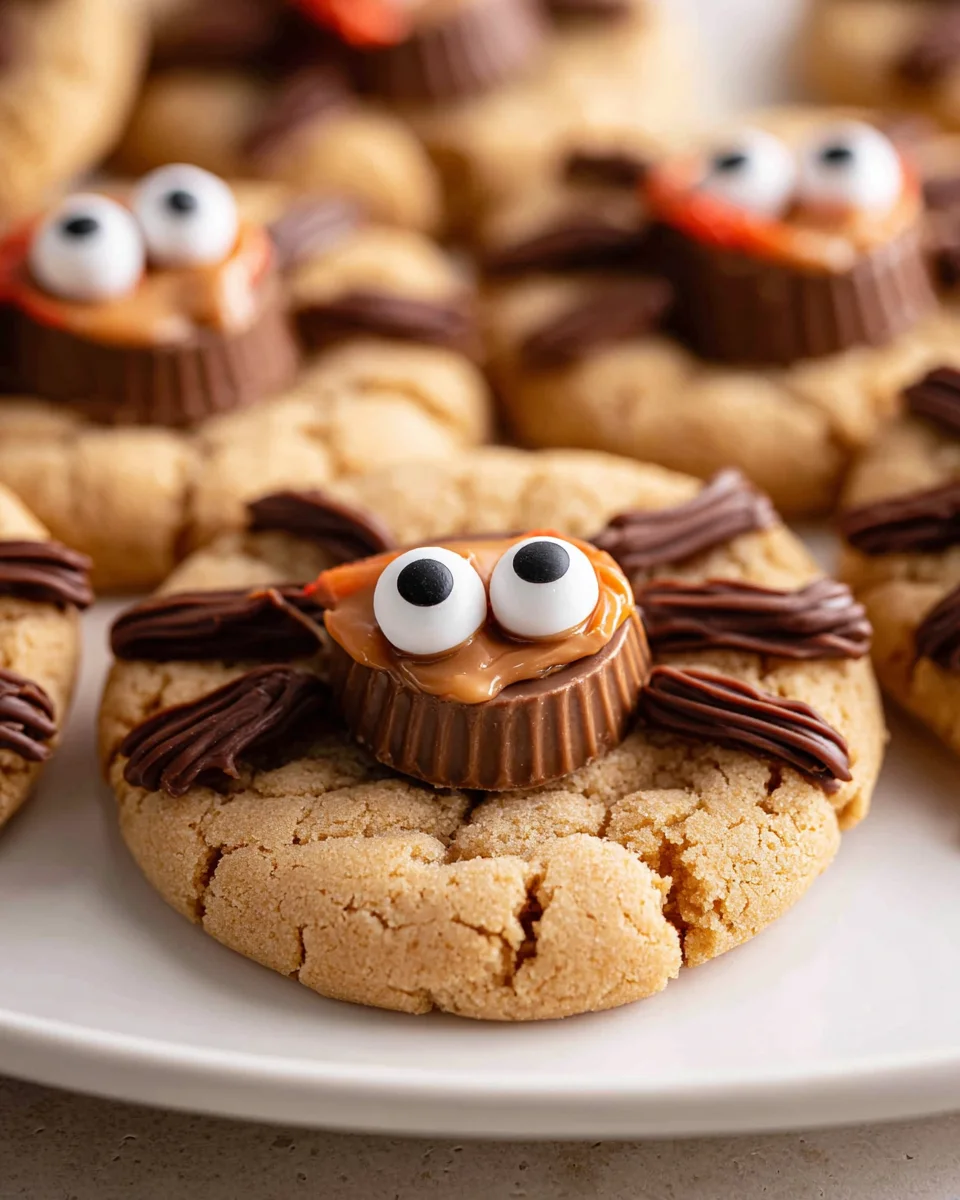
These Spider Cookies are a delightful treat perfect for Halloween or any festive occasion. With their unique design and fun toppings, these cookies will be a hit at parties and gatherings. Made with creamy peanut butter and decorated to look like spiders, they’re not only visually appealing but also deliciously satisfying. Enjoy the blend of flavors and the joy of creating these spooky treats with your family!
Why You’ll Love This Recipe
- Easy to Make: The simple preparation steps make this recipe accessible even for beginner bakers.
- Fun for All Ages: Decorating the cookies can be a fun activity for kids and adults alike, bringing everyone together.
- Versatile Treat: These cookies are perfect for Halloween, school events, or any time you want a sweet, themed dessert.
- Deliciously Nutty Flavor: The rich peanut butter flavor pairs perfectly with the chocolate, making them irresistible.
- Customizable Decorations: You can get creative with how you decorate your Spider Cookies, allowing for personalization.
Tools and Preparation
To make these Spider Cookies, you’ll need a few essential kitchen tools that will help streamline the process.
Essential Kitchen Tools
- Baking sheet
- Parchment paper or baking mat
- Medium cookie scoop
- Microwave-safe bowl
- Zip-top bag
Why These Tools Matter
- Baking sheet: Provides an even surface for baking and ensures consistent results.
- Parchment paper or baking mat: Prevents cookies from sticking and makes cleanup easy.
- Medium cookie scoop: Helps create uniform cookie sizes for even baking.
- Microwave-safe bowl: Ideal for melting chocolate without burning it.
Ingredients
For the Cookies
- 1 cup creamy peanut butter
- 1/2 cup granulated sugar (plus more for rolling)
- 1 egg
For the Decoration
- 1/4 cup chocolate melting wafers
- 12 miniature Reese’s peanut butter cups
- 24 mini candy eyes
How to Make Spider Cookies
Step 1: Make Cookie Dough
Preheat your oven to 350°F. Line one baking sheet with parchment paper or a baking mat and set it aside. In a medium bowl, mix together 1 cup of peanut butter, 1/2 cup of sugar, and 1 egg. If the dough is too sticky, you can refrigerate it for 10-20 minutes.
Step 2: Roll in Sugar
Roll the dough into 12 (1-inch) balls using a medium cookie scoop. Drop each ball into additional sugar to coat. Place them on the prepared baking sheet and press down with a fork to create a cross pattern.
Step 3: Bake
Bake the cookies in the preheated oven for 8-10 minutes or until they are very lightly browned on the bottoms. Remove them from the oven and let them rest on the pan for about 2 minutes.
Step 4: Place Peanut Butter Cups
While the cookies are still warm, place one miniature Reese’s peanut butter cup on top of each cookie. Allow them to cool on a cooling rack after this step.
Step 5: Decorate Like Spiders
Once the cookies have cooled completely, melt the chocolate in a microwave-safe bowl in 30-second increments, stirring in between until fully melted. Transfer melted chocolate to a zip-top bag; snip off one corner. Pipe two dots on top of each Reese’s cup for eyes and attach two mini candy eyes. Next, draw four legs on each side of the Reese’s using melted chocolate. Allow the chocolate to harden before serving.
Enjoy your delicious Spider Cookies!
How to Serve Spider Cookies
Spider cookies are a delightful treat that can bring joy to any gathering, especially during Halloween. They not only taste amazing but also look fun and festive. Here are some creative ways to serve these spooky delights!
With Milk
- A classic pairing with spider cookies is a cold glass of milk. The creaminess of the milk complements the rich peanut butter flavor perfectly.
Halloween-Themed Platter
- Arrange your spider cookies on a Halloween-themed platter decorated with fake spiders or webbing to enhance the spooky effect for your guests.
Gift Bags
- Package individual spider cookies in cute gift bags tied with orange ribbons. This makes for a perfect treat to give away during Halloween parties or school events.
Ice Cream Sandwiches
- Sandwich a scoop of vanilla or chocolate ice cream between two spider cookies for a delicious twist that will impress everyone.
Party Favors
- Use spider cookies as party favors for Halloween celebrations. Place them in decorated boxes, allowing guests to take home a sweet memory of the event.
Coffee Pairing
- Serve your spider cookies alongside a cup of coffee or hot chocolate. The warmth of the drink balances the sweetness of the cookie, making it an enjoyable treat any time of day.
How to Perfect Spider Cookies
Perfecting your spider cookies can elevate their taste and appearance significantly. Here are some helpful tips:
- Chill the Dough: If your cookie dough is too sticky, refrigerate it for 10-20 minutes before rolling. This makes it easier to handle and shape.
- Use Fresh Ingredients: Ensure all ingredients, especially peanut butter, are fresh for optimal flavor and texture in your cookies.
- Uniform Size: Use a cookie scoop to ensure each cookie is uniform in size, allowing them to bake evenly and look more appealing.
- Adjust Baking Time: Keep an eye on the baking time. Every oven is different; remove them when they are just lightly browned for the best texture.
- Decorate Creatively: Have fun with decorating! Use different types of candy eyes or drizzle additional melted chocolate for more intricate designs.
- Store Properly: Keep leftover cookies in an airtight container at room temperature to maintain their freshness and chewiness.
Best Side Dishes for Spider Cookies
While spider cookies are delightful on their own, serving them with complementary side dishes can enhance your dessert experience. Here are some ideas:
- Pumpkin Spice Muffins: These moist muffins add a seasonal touch that pairs well with the nutty flavors of spider cookies.
- Apple Slices with Caramel Dip: The crispness of apple slices dipped in caramel provides a refreshing contrast to the richness of peanut butter.
- Cheese Platter: A selection of cheeses can balance out the sweetness of spider cookies while adding savory notes to your dessert table.
- Chocolate-Covered Pretzels: The salty crunch of pretzels coated in chocolate complements spider cookies beautifully, creating a sweet-and-salty treat combo.
- Fruit Salad: A fresh fruit salad sprinkled with cinnamon adds brightness and lightness alongside your rich peanut butter treats.
- Mini Cupcakes: Bite-sized cupcakes offer variety and can be decorated with similar Halloween themes, keeping your dessert display cohesive and festive.
Common Mistakes to Avoid
When making Spider Cookies, it’s important to avoid common pitfalls that can ruin your baking experience. Here are some mistakes to watch out for:
- Skipping the chilling step: If your cookie dough is too sticky, not refrigerating it can lead to flat cookies. Chill for 10-20 minutes for better structure.
- Not measuring ingredients accurately: Use a proper measuring cup for peanut butter and sugar. Inaccurate measurements can affect texture and flavor.
- Overbaking the cookies: Keep an eye on the baking time. Cookies should be lightly browned on the bottoms; overbaking makes them hard.
- Neglecting cooling time: Allow cookies to rest on the pan before moving them. This helps them set and prevents breakage.
- Forgetting to decorate immediately: Place the peanut butter cups on warm cookies right after baking. Waiting too long makes it harder for the cups to stick.
Refrigerator Storage
- Store in an airtight container for up to 5 days.
- Keep layers of cookies separated with parchment paper to prevent sticking.
Freezing Spider Cookies
- Freeze in a single layer before transferring them to a freezer-safe bag.
- They can last up to 3 months in the freezer.
Reheating Spider Cookies
- Oven: Preheat to 350°F and warm cookies for about 5 minutes until soft.
- Microwave: Heat individually for about 10-15 seconds. Avoid overheating as they can become tough.
- Stovetop: Wrap in foil and heat gently on low for a few minutes until warmed through.
Frequently Asked Questions
What are Spider Cookies?
Spider Cookies are fun Halloween treats made from peanut butter cookies topped with candy eyes and decorated like spiders.
How do I customize my Spider Cookies?
You can add different toppings like nuts or switch up the type of chocolate used for decoration. Get creative!
Can I use other nut butters?
Yes! You can substitute creamy almond or cashew butter if you prefer a different flavor profile.
How do I store leftover Spider Cookies?
Store them in an airtight container at room temperature or freeze them for longer storage.
Conclusion
These Spider Cookies are delightful treats perfect for Halloween gatherings! Their fun design and rich peanut butter flavor make them appealing to both kids and adults alike. Feel free to customize with your favorite toppings or adjust the decorations as desired. Try this recipe today and enjoy these spooky yet tasty delights!

Spider Cookies
- Total Time: 25 minutes
- Yield: Approximately 12 servings 1x
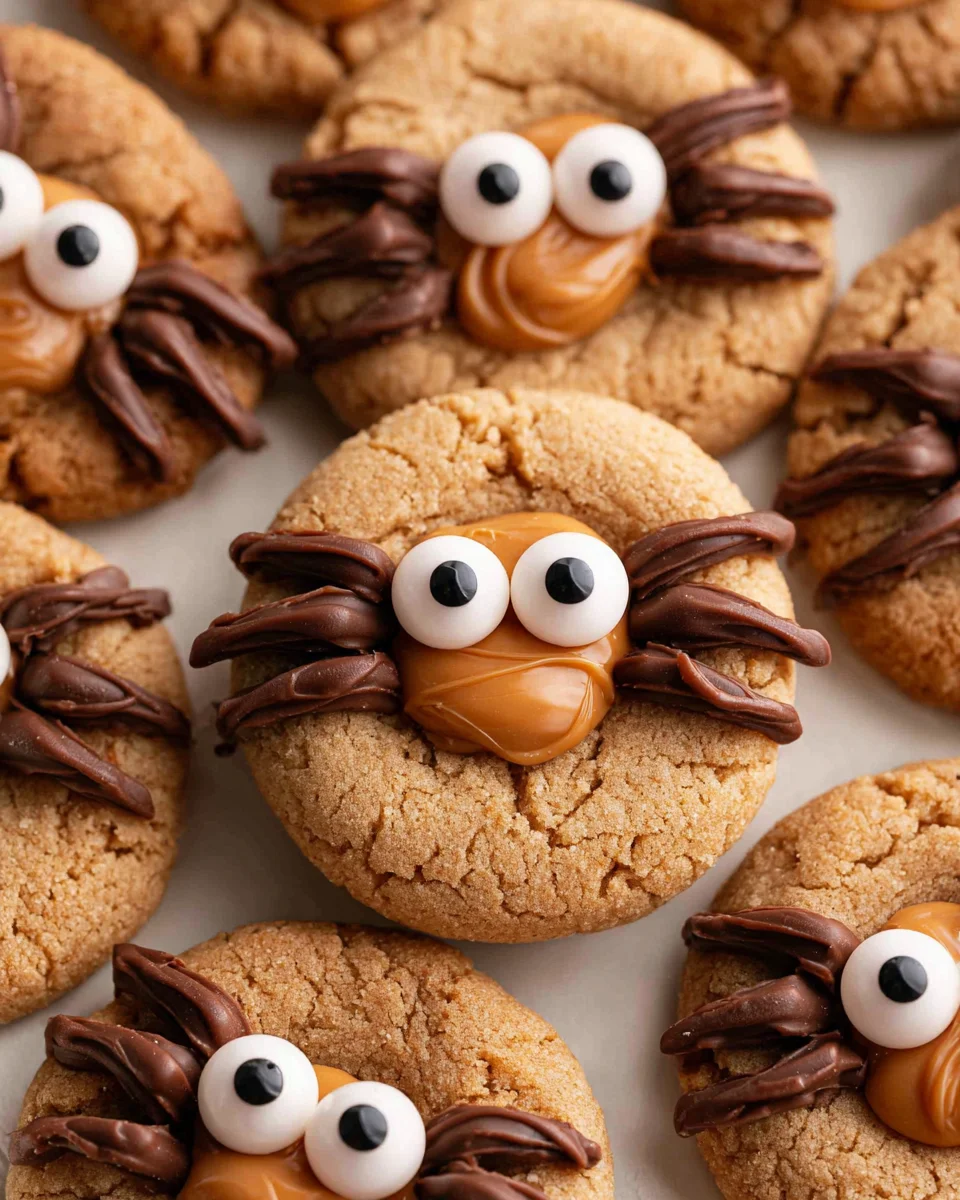
Description
Create delightful Spider Cookies that are perfect for Halloween and any festive occasion! These fun, peanut butter-based treats are not only visually appealing with their spooky spider design but also incredibly easy to make. Gather your family for a fun decorating session as you pipe chocolate legs and add candy eyes to these delicious cookies. With a rich nutty flavor complemented by sweet chocolate, these cookies are sure to be a hit at parties, school events, or as a unique gift. Enjoy the joy of baking together while crafting these charmingly creepy confections!
Ingredients
- 1 cup creamy peanut butter
- 1/2 cup granulated sugar (plus more for rolling)
- 1 egg
- 1/4 cup chocolate melting wafers
- 12 miniature chocolate peanut butter cups
- 24 mini candy eyes
Instructions
- Preheat your oven to 350°F and line a baking sheet with parchment paper.
- In a medium bowl, mix together the peanut butter, sugar, and egg until well combined. If sticky, refrigerate for 10-20 minutes.
- Roll the dough into 12 one-inch balls, coat in sugar, and place on the prepared baking sheet. Press down with a fork to create a cross pattern.
- Bake for 8-10 minutes until lightly browned on the bottoms. Let them rest for 2 minutes before placing one chocolate peanut butter cup on each cookie.
- Once cooled, melt the chocolate in a microwave-safe bowl and transfer it to a zip-top bag. Pipe two dots on each chocolate cup for eyes and attach candy eyes; draw legs with melted chocolate.
- Prep Time: 15 minutes
- Cook Time: 10 minutes
- Category: Dessert
- Method: Baking
- Cuisine: American
Nutrition
- Serving Size: 1 cookie (30g)
- Calories: 130
- Sugar: 10g
- Sodium: 70mg
- Fat: 7g
- Saturated Fat: 2g
- Unsaturated Fat: 5g
- Trans Fat: 0g
- Carbohydrates: 13g
- Fiber: 1g
- Protein: 3g
- Cholesterol: 0mg