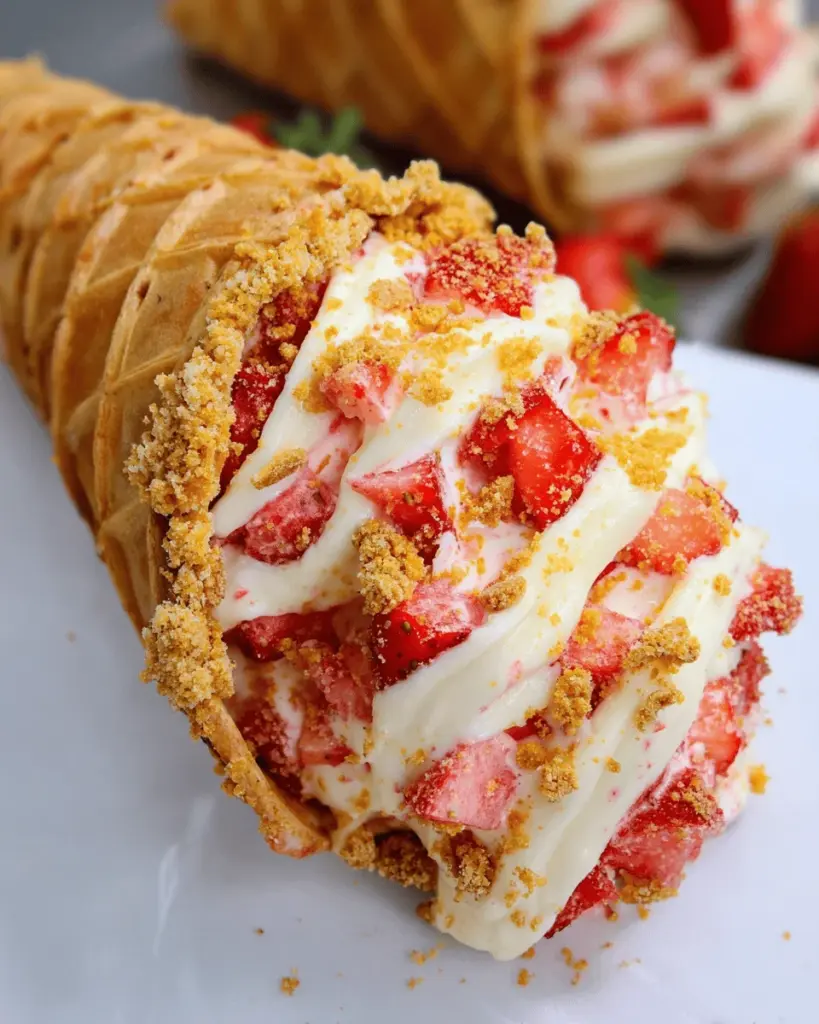
These Strawberry Crunch Cheesecake Cones are a delightful treat that combines creamy cheesecake filling with the crunch of cookies and fresh strawberries. Perfect for summer parties, picnics, or even a cozy night in, these cones are sure to impress your family and friends. With their unique presentation and delicious flavors, they stand out as a fun dessert option that everyone will love.
Why You’ll Love This Recipe
- Easy to Prepare: With simple ingredients and straightforward steps, you’ll have these cones ready in no time.
- Refreshing Flavor: The combination of fresh strawberries and creamy cheesecake makes for a light, refreshing dessert.
- Fun Presentation: Serving cheesecake in waffle cones adds an exciting twist to a classic treat.
- Customizable Options: Feel free to mix in different fruits or toppings to suit your taste preferences.
- Perfect for Any Occasion: Whether it’s a holiday gathering or a casual barbecue, these cones fit right in.
Tools and Preparation
To make your Strawberry Crunch Cheesecake Cones, you’ll need some essential kitchen tools. Having the right equipment will streamline your process and help you create these delicious treats effortlessly.
Essential Kitchen Tools
- Mixing bowls
- Whisk
- Baking pan
- Parchment paper
- Food processor (optional)
- Spatula
Why These Tools Matter
- Mixing bowls: Ideal for combining ingredients without making a mess.
- Whisk: Perfect for achieving smooth and creamy cheesecake filling.
- Baking pan: Essential for preparing the crunchy cookie topping evenly.
- Spatula: Helps you easily fill the cones with the cheesecake mixture without spilling.
Ingredients
These strawberry crunch cheesecake cones are the perfect way to cool down on a hot day. Whip up a batch today!
Ingredients:
– 6 waffle cones
– Fresh strawberries (chopped)
– 1 container of white cake icing
– 16 Golden Oreos
– 3 Tbsp melted unsalted butter
– 1 box (3 oz) strawberry Jello mix
– 2 bricks room temp cream cheese
– 1 container (8 oz) Cool Whip
– 1/2 C granulated sugar
– 2 tsp pure vanilla extract
– 2 Tbsp flour
– 1 C powdered sugar
– 4 Tbsp heavy whipping cream
– 1/2 tsp pure vanilla extract

How to Make Strawberry Crunch Cheesecake Cones
Step 1: Preheat the Oven
Preheat your oven to 350 degrees Fahrenheit. This step is crucial for ensuring your crunchy topping comes out perfectly baked.
Step 2: Prepare the Crunch Topping
- In a food processor, crush the Golden Oreos until they resemble fine crumbs.
- In a mixing bowl, combine the crushed cookies with melted unsalted butter. Mix well until all crumbs are coated.
- Spread the mixture evenly onto a lined baking pan.
- Bake for about 10 minutes or until golden brown. Let it cool completely before using.
Step 3: Make the Cheesecake Filling
- In a large mixing bowl, beat together room temperature cream cheese, granulated sugar, and vanilla extract until smooth.
- Gently fold in the Cool Whip, mixing until fully incorporated.
- Add in the strawberry Jello mix, flour, powdered sugar, and heavy whipping cream; mix well until creamy.
Step 4: Assemble Your Cones
- Take each waffle cone and gently fill it with the cheesecake mixture using a spatula or piping bag.
- Top each filled cone with chopped fresh strawberries and sprinkle with the cooled cookie crunch topping.
Step 5: Chill and Serve
Place the assembled cones in the refrigerator for at least an hour before serving to let them set slightly, then enjoy this refreshing treat!
How to Serve Strawberry Crunch Cheesecake Cones
Strawberry Crunch Cheesecake Cones are not just a delightful dessert; they can also be served in various fun ways that enhance their appeal. Here are some creative serving suggestions to elevate your dessert experience.
Individual Dessert Cups
- Use small clear cups to layer the cheesecake filling and strawberries for an elegant presentation.
Ice Cream Sundae Style
- Top with a scoop of vanilla ice cream and drizzle with chocolate syrup for an indulgent twist.
Party Platters
- Arrange the cones on a colorful platter alongside fresh fruit for a beautiful dessert display at gatherings.
Family Style Serving
- Set out a variety of toppings like sprinkles, nuts, and extra strawberries, allowing guests to customize their cones.
Picnic Treats
- Pack these cones in a cooler for a refreshing dessert option during outdoor picnics or barbecues.
How to Perfect Strawberry Crunch Cheesecake Cones
Creating the perfect Strawberry Crunch Cheesecake Cones is all about attention to detail. Here are some tips to ensure your dessert turns out delicious every time.
- Use Fresh Ingredients: Fresh strawberries will enhance flavor and texture, making your cones more enjoyable.
- Chill the Filling: Allow the cheesecake mixture to chill for at least an hour before filling the cones. This helps it set properly.
- Crush Oreos Properly: Ensure the Golden Oreos are finely crushed for an even crunch throughout your dessert.
- Adjust Sweetness: Taste the filling before serving and adjust sugar levels as needed to suit your palate.
- Serve Immediately: For the best texture, serve the cones soon after filling them to prevent sogginess from the cream cheese mixture.
- Experiment with Flavors: Don’t hesitate to mix in different flavors or fruits into your cheesecake filling for unique variations.

Best Side Dishes for Strawberry Crunch Cheesecake Cones
Serving Strawberry Crunch Cheesecake Cones? Pair them with complementary side dishes that balance their sweetness and add variety. Here are some great options:
- Fresh Fruit Salad: A mix of seasonal fruits adds freshness and bright flavors that complement cheesecake.
- Mini Pies: Offer small servings of fruit pies, such as apple or blueberry, for an additional sweet option without overwhelming guests.
- Cheese Platter: A selection of mild cheeses can provide a savory balance to the sweet cheesecake cones.
- Chocolate-Covered Pretzels: The salty crunch of pretzels dipped in chocolate offers a delightful contrast to the creamy cones.
- Yogurt Parfaits: Layer yogurt with granola and berries for a light, healthy side that pairs well with rich desserts.
- Homemade Cookies: Serve classic cookies like chocolate chip or oatmeal raisin as an easy-to-eat side that everyone loves.
Common Mistakes to Avoid
When making Strawberry Crunch Cheesecake Cones, it’s easy to slip up. Here are some common mistakes and how to steer clear of them.
- Skipping the Cream Cheese Softening: Not allowing the cream cheese to reach room temperature can lead to a lumpy filling. Always soften it before mixing for a smooth texture.
- Overmixing the Ingredients: Mixing too vigorously can add air to your cheesecake mixture, resulting in cracks. Mix just until combined for the best results.
- Ignoring the Cone Structure: Filling the cones too full may cause them to break. Fill them carefully, leaving some space at the top for easy handling.
- Using Unsweetened Strawberries: Fresh strawberries bring sweetness and flavor. Ensure they are ripe and sweet; otherwise, consider adding a little sugar to enhance their taste.
- Not Letting Them Chill: Serving right away might make them messy. Allowing the cones to chill sets the filling and improves flavors.
Storage and Reheating
Refrigerator Storage
-
- Duration: Store in the refrigerator for up to 3 days.
-
- Containers: Use airtight containers to keep them fresh and prevent sogginess.
Freezing Strawberry Crunch Cheesecake Cones
-
- Duration: They can be frozen for up to 1 month.
-
- Containers: Wrap each cone tightly in plastic wrap before placing them in a freezer-safe container.
Reheating Strawberry Crunch Cheesecake Cones
- Oven: Preheat to 350°F (175°C) and warm for about 5 minutes until slightly softened.
- Microwave: Heat on medium power for 10-15 seconds, checking frequently.
- Stovetop: Place on low heat in a skillet for a few minutes, turning gently until warm.

Frequently Asked Questions
What are Strawberry Crunch Cheesecake Cones?
Strawberry Crunch Cheesecake Cones are delightful desserts featuring a creamy cheesecake filling topped with crunchy strawberry goodness in a waffle cone.
Can I customize my Strawberry Crunch Cheesecake Cones?
Absolutely! You can use different fruits like blueberries or raspberries, or experiment with flavored cake icing for unique twists.
How should I store leftover Strawberry Crunch Cheesecake Cones?
Store them in an airtight container in the refrigerator for up to three days, or freeze them tightly wrapped for up to one month.
Are there any tips for making these cones?
Ensure your ingredients are at room temperature before mixing. This will help achieve a smooth consistency and enhance flavor.
Conclusion
Strawberry Crunch Cheesecake Cones are not only refreshing but also versatile. Feel free to customize the toppings or fillings according to your taste preferences. Try making these delightful treats today!

Strawberry Crunch Cheesecake Cones
- Total Time: 30 minutes
- Yield: Serves 6
Description
Indulge in the delightful experience of Strawberry Crunch Cheesecake Cones—a refreshing dessert that marries creamy cheesecake filling with a crunchy cookie topping and fresh strawberries. Perfect for summer gatherings, picnics, or simply enjoying at home, these cones are easy to prepare and offer a fun twist on traditional desserts. With their vibrant flavors and charming presentation, they are sure to impress everyone at your table. The best part? You can customize these cones with your favorite fruits or toppings, making them an ideal treat for any occasion.
Ingredients
- 6 waffle cones
- Fresh strawberries (chopped)
- 1 container of white cake icing
- 16 Golden Oreos
- 3 Tbsp melted unsalted butter
- 1 box (3 oz) strawberry Jello mix
- 2 bricks room temperature cream cheese
- 1 container (8 oz) Cool Whip
- 1/2 C granulated sugar
- 2 tsp pure vanilla extract
- 2 Tbsp flour
- 1 C powdered sugar
- 4 Tbsp heavy whipping cream
Instructions
- Preheat the oven to 350°F (175°C).
- In a food processor, crush the Golden Oreos into fine crumbs. Mix with melted butter until coated. Spread on a baking pan and bake for about 10 minutes until golden brown. Cool completely.
- In a large bowl, beat cream cheese, sugar, and vanilla until smooth. Fold in Cool Whip, then add strawberry Jello mix, flour, powdered sugar, and whipping cream; mix until creamy.
- Fill each waffle cone with the cheesecake mixture using a spatula or piping bag.
- Top with chopped strawberries and sprinkle with the cooled cookie crunch. Chill cones for at least one hour before serving.
- Prep Time: 20 minutes
- Cook Time: 10 minutes
- Category: Dessert
- Method: Baking
- Cuisine: American
Nutrition
- Serving Size: 1 cone (100g)
- Calories: 290
- Sugar: 26g
- Sodium: 150mg
- Fat: 15g
- Saturated Fat: 8g
- Unsaturated Fat: 7g
- Trans Fat: 0g
- Carbohydrates: 34g
- Fiber: 1g
- Protein: 4g
- Cholesterol: 30mg
