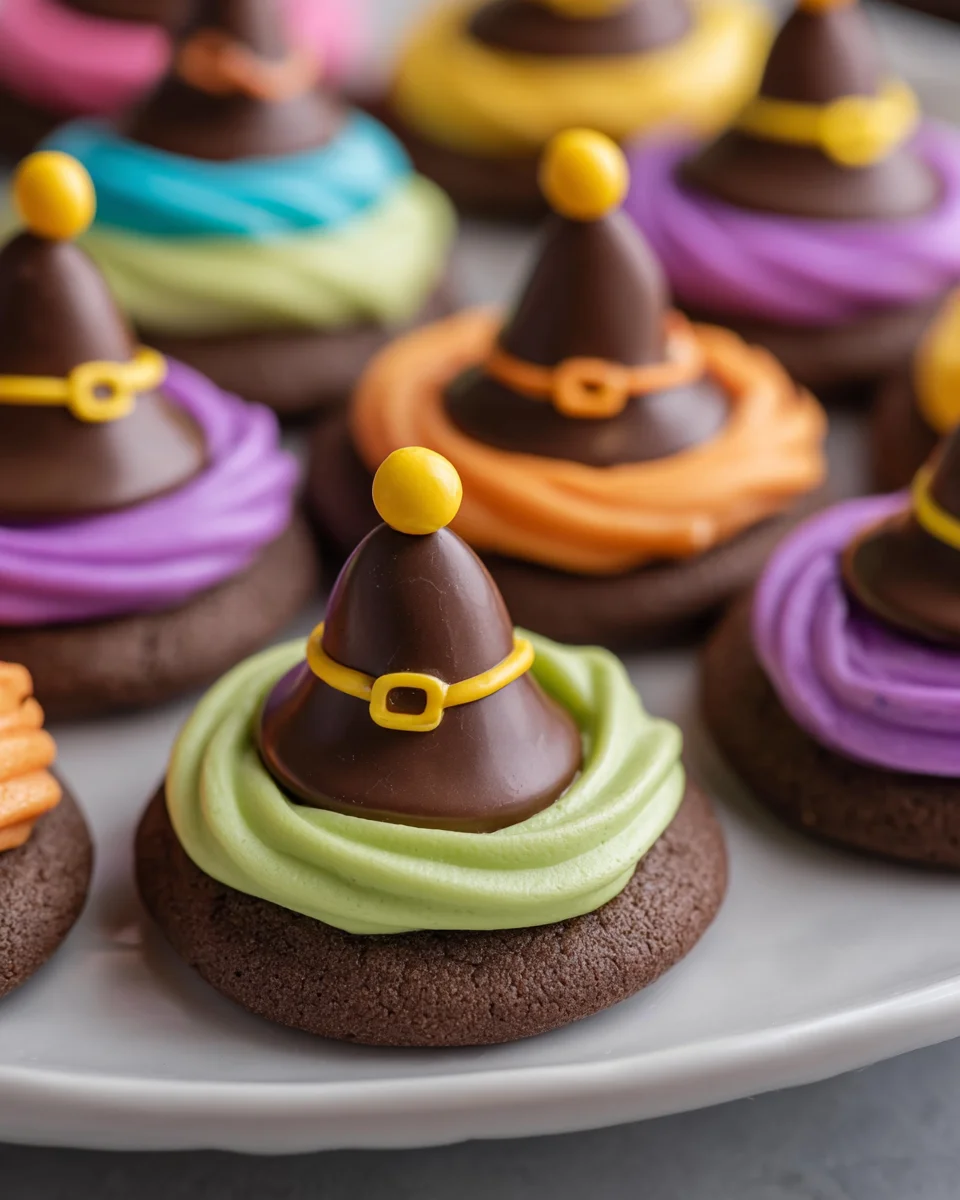
Witch Hat Cookies are a delightful and whimsical treat perfect for Halloween celebrations. These no-bake cookies not only capture the festive spirit but also bring joy to both kids and adults alike. With their charming shape and colorful decorations, they serve as a fun activity that engages everyone in the kitchen. Whether for a spooky gathering or just a sweet treat at home, these cookies stand out with their unique design and easy preparation.
Why You’ll Love This Recipe
- Quick and Easy: No baking is required, making it a fast option for last-minute treats.
- Kid-Friendly: Children can join in the fun of decorating, turning it into a memorable family activity.
- Customizable Colors: Use any food coloring to match your Halloween theme or personal preferences.
- Deliciously Fun: The combination of fudge-covered cookies and chocolate kisses makes for a tasty dessert.
- Perfect for Sharing: With 18 servings, they are great for parties or school events.
Tools and Preparation
Gathering the right tools will help streamline your cookie-making process.
Essential Kitchen Tools
- Baking tray
- Small bowls
- Piping or sandwich bags
Why These Tools Matter
- Baking tray: Provides a flat surface to arrange your cookies neatly.
- Small bowls: Ideal for mixing and holding different frosting colors without mess.
- Piping or sandwich bags: Perfect for applying frosting precisely to create beautiful designs.
Ingredients
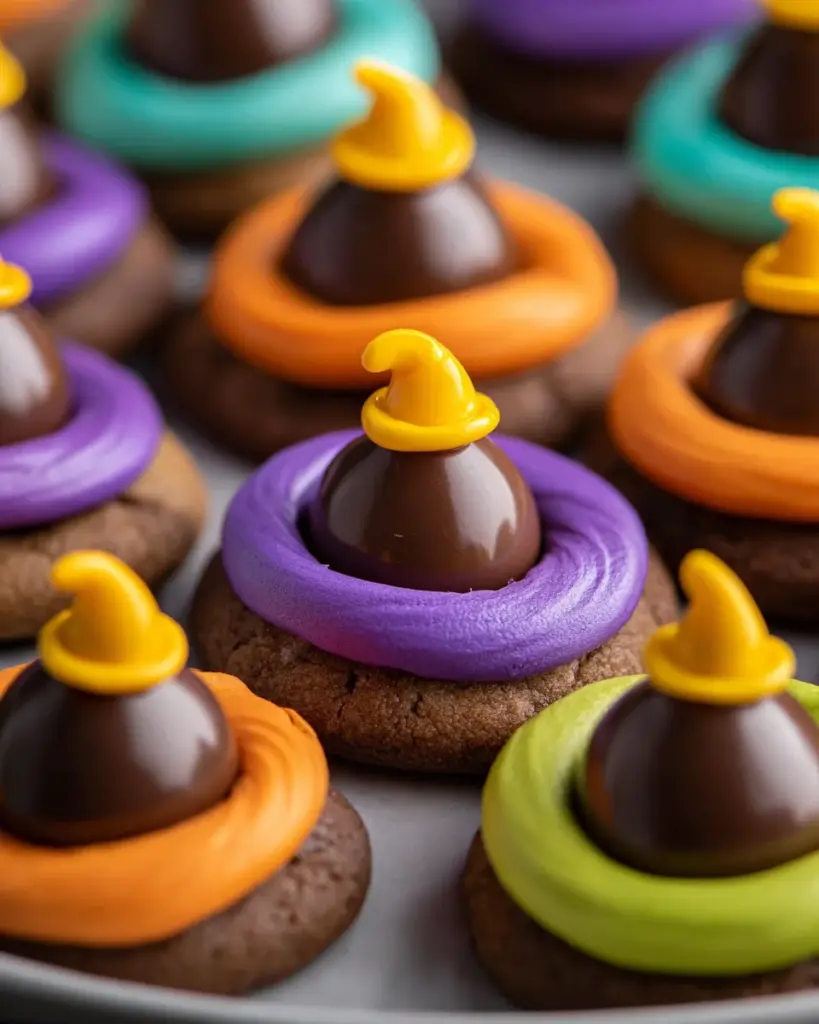
No bake Witch Hat Cookies are a cute, edible Halloween craft to make with kids.
For the Cookies
- 1 packet fudge-covered cookies
- 16 ounce tub of white frosting
- Food coloring
- 18 Chocolate kisses (unwrapped) (1 for each cookie)
- 18 Mini yellow M&Ms (1 for each cookie)
How to Make Witch Hat Cookies
Step 1: Arrange the Cookies
Arrange the cookies in a single layer on a baking tray.
Step 2: Prepare Frosting Colors
Divide the frosting into small bowls, one for each color you plan to use. Add food coloring until you achieve your desired shades.
Step 3: Fill the Bags with Frosting
Add each frosting color to a piping or sandwich bag with the corner cut off.
Step 4: Add Frosting to Cookies
Place a dollop of frosting about the size of a chocolate kiss in the center on top of each cookie.
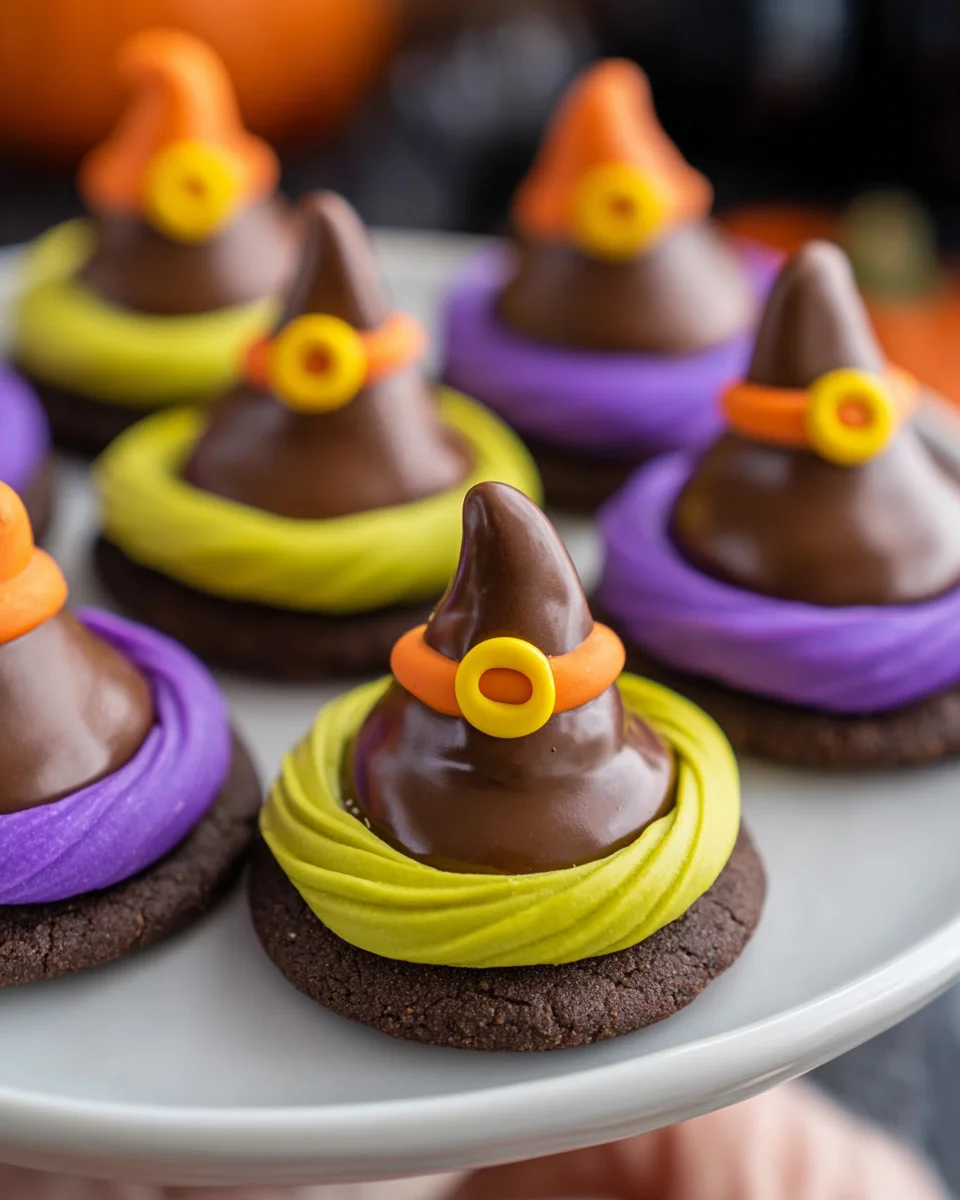
Step 5: Create the Witch Hats
Press one chocolate kiss down into the center of the frosting to create the top of the hat. As you press down, the frosting will form a ring slightly larger than the kiss.
Step 6: Add Buckles
Add one Mini yellow M&M to the band of frosting on each cookie to create an adorable buckle.
Step 7: Set Before Serving
Allow the frosting to set for 15-20 minutes before enjoying your witch hats.
How to Serve Witch Hat Cookies
Witch Hat Cookies are not just a delightful treat; they’re also a fun addition to any Halloween gathering. These whimsical cookies can be served in various creative ways that will enchant both kids and adults alike.
Fun Halloween Dessert Platter
- Arrange your Witch Hat Cookies on a colorful platter alongside other spooky treats like ghost-shaped marshmallows and pumpkin cupcakes for an eye-catching display.
Trick-or-Treat Bags
- Place one or two Witch Hat Cookies in small Halloween-themed bags. This makes for a charming treat for trick-or-treaters or as party favors at your Halloween celebration.
Classroom Treats
- Share these cookies with classmates during school Halloween parties. They are easy to make and transport, bringing smiles to children’s faces.
Themed Parties
- Serve these cookies at themed parties, such as costume contests or movie nights featuring Halloween classics. They add a festive touch to your table setting.
Family Game Night
- Incorporate Witch Hat Cookies into family game night as a sweet reward for winners. This adds an extra layer of fun to friendly competition!
How to Perfect Witch Hat Cookies
To ensure your Witch Hat Cookies turn out perfect every time, follow these tips for great results.
- Choose the Right Frosting: A thicker frosting will hold its shape better when you press the chocolate kiss on top. Look for frosting labeled as “decorating” or “stiff.”
- Colorful Creations: Use vibrant food coloring to make your frosting pop! Mixing colors can create unique designs and themes that match your Halloween decor.
- Work Quickly: The frosting can set quickly, so work efficiently when assembling the cookies. Have all ingredients ready before starting.
- Storage Tips: Keep leftover cookies in an airtight container at room temperature. This helps maintain their freshness and prevents them from becoming too soft.
- Experiment with Toppings: Get creative by adding sprinkles or edible glitter to the frosting for extra flair! Kids will love customizing their witch hats.
- Presentation Matters: Arrange the finished cookies on spooky-themed plates or tiered stands for an impressive display that will wow your guests.
Best Side Dishes for Witch Hat Cookies
Witch Hat Cookies make a fantastic dessert, but pairing them with complementary side dishes can enhance the overall experience of your Halloween feast.
- Mini Pumpkin Pies: Individual-sized pumpkin pies bring a classic fall flavor that’s perfect for Halloween festivities.
- Ghostly Cheese Sticks: String cheese decorated with ghost faces using black olives create a fun savory option.
- Veggie Skeleton Tray: Arrange various colorful vegetables into the shape of a skeleton for a healthy, yet festive snack.
- Spooky Fruit Salad: Combine seasonal fruits like oranges and apples in a bowl, adding gummy worms for a creepy touch.
- Bat Wings: Serve chicken wings tossed in barbecue sauce as a savory treat that pairs well with sweet desserts.
- Pumpkin Spice Popcorn: Coat popcorn with pumpkin spice seasoning for a crunchy snack that complements the cookies perfectly.
- Creepy Crawly Cupcakes: Decorate cupcakes with creepy-crawly candy insects on top for an eerie dessert option.
- Mummy Hot Dogs: Wrap chicken chicken hot dogs in crescent roll dough and bake until golden brown; they’re fun and delicious!
Common Mistakes to Avoid
Making Witch Hat Cookies is a fun and creative activity, but there are some common mistakes that can affect your results. Here are a few to watch out for:
- Not Using Fresh Ingredients: Always check the expiration dates on your cookies and frosting. Fresh ingredients ensure better taste and texture.
- Overfilling the Frosting Bags: Avoid overfilling your piping bags with frosting. If they’re too full, it can be messy and difficult to control.
- Skipping the Setting Time: Don’t rush the setting time of the frosting. Allowing 15-20 minutes for it to set makes the cookies easier to handle and enjoy.
- Using Different Cookie Sizes: Make sure to use uniform cookie sizes for even decoration. Mixing sizes can lead to uneven witch hats.
- Forgetting About Storage: If you’re not eating them right away, store your cookies properly to maintain freshness. Use airtight containers to keep them from drying out.
Refrigerator Storage
- Store Witch Hat Cookies in an airtight container.
- They will last up to 5 days in the refrigerator.
- Place parchment paper between layers if stacking.
Freezing Witch Hat Cookies
- Freeze cookies individually on a baking tray before transferring them to an airtight container.
- They can be frozen for up to 3 months.
- Thaw in the refrigerator before enjoying.
Reheating Witch Hat Cookies
- Oven: Preheat to 350°F (175°C) and heat for about 5 minutes until just warmed.
- Microwave: Heat on a microwave-safe plate for 10-15 seconds for a quick warm-up.
- Stovetop: Place on a pan over low heat briefly until warmed through; this method keeps them soft.

Frequently Asked Questions
What are Witch Hat Cookies?
Witch Hat Cookies are no-bake treats that resemble witches’ hats, made using fudge-covered cookies, frosting, chocolate kisses, and candy.
How can I customize my Witch Hat Cookies?
You can change the colors of the frosting or use different candies for decoration. Adding sprinkles or edible glitter can also enhance their festive look!
Are Witch Hat Cookies suitable for kids?
Yes! These cookies are a fun project for kids since they can help with decorating and assembling.
How long does it take to make Witch Hat Cookies?
The total time is about 30 minutes, with only 15 minutes of preparation time, making it a quick and easy Halloween treat.
Conclusion
Witch Hat Cookies offer a delightful mix of creativity and taste, perfect for Halloween celebrations. With simple ingredients and endless customization options, these cookies are not only fun to make but also a hit among kids and adults alike. Try experimenting with different colors or toppings to make them uniquely yours!

Witch Hat Cookies
- Total Time: 15 minutes
- Yield: 18 servings 1x
Description
Witch Hat Cookies are a delightful, no-bake treat that perfectly captures the spirit of Halloween. These charming cookies resemble whimsical witches’ hats and offer a fun, engaging activity for families to enjoy together. With their unique design and colorful decorations, they are sure to impress both kids and adults alike. Made with simple ingredients like fudge-covered cookies, creamy frosting, and chocolate kisses, these cookies are not only easy to prepare but also customizable to fit any Halloween theme.
Ingredients
- 1 packet fudge-covered cookies
- 16 ounces white frosting
- Food coloring (various colors)
- 18 chocolate kisses (unwrapped)
- 18 mini yellow M&Ms
Instructions
- Arrange the fudge-covered cookies in a single layer on a baking tray.
- Divide the white frosting into small bowls and mix in food coloring until desired shades are achieved.
- Fill piping bags with the colored frosting by cutting off one corner.
- Place a dollop of frosting on each cookie's center.
- Press one chocolate kiss into the frosting to create the witch hat shape.
- Add a mini yellow M&M as a buckle on each hat.
- Allow cookies to set for 15-20 minutes before serving.
- Prep Time: 15 minutes
- Cook Time: 0 minutes
- Category: Dessert
- Method: No-bake
- Cuisine: American
Nutrition
- Serving Size: 1 serving
- Calories: 130
- Sugar: 10g
- Sodium: 50mg
- Fat: 6g
- Saturated Fat: 3g
- Unsaturated Fat: 2g
- Trans Fat: 0g
- Carbohydrates: 19g
- Fiber: 0g
- Protein: 1g
- Cholesterol: 0mg