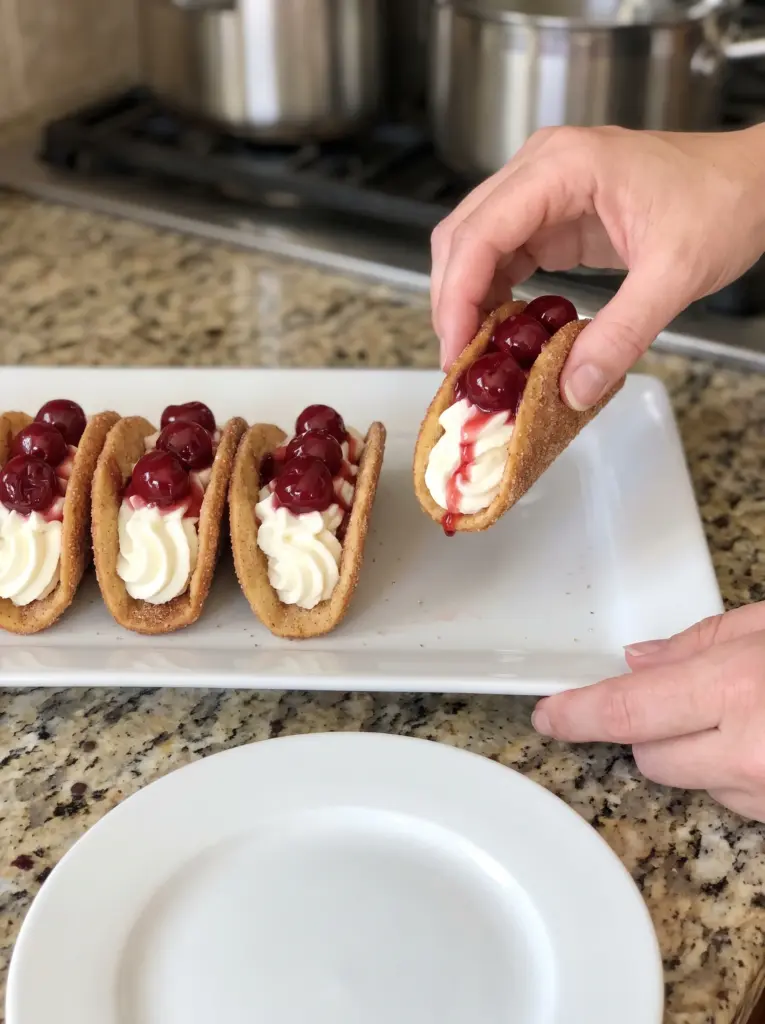
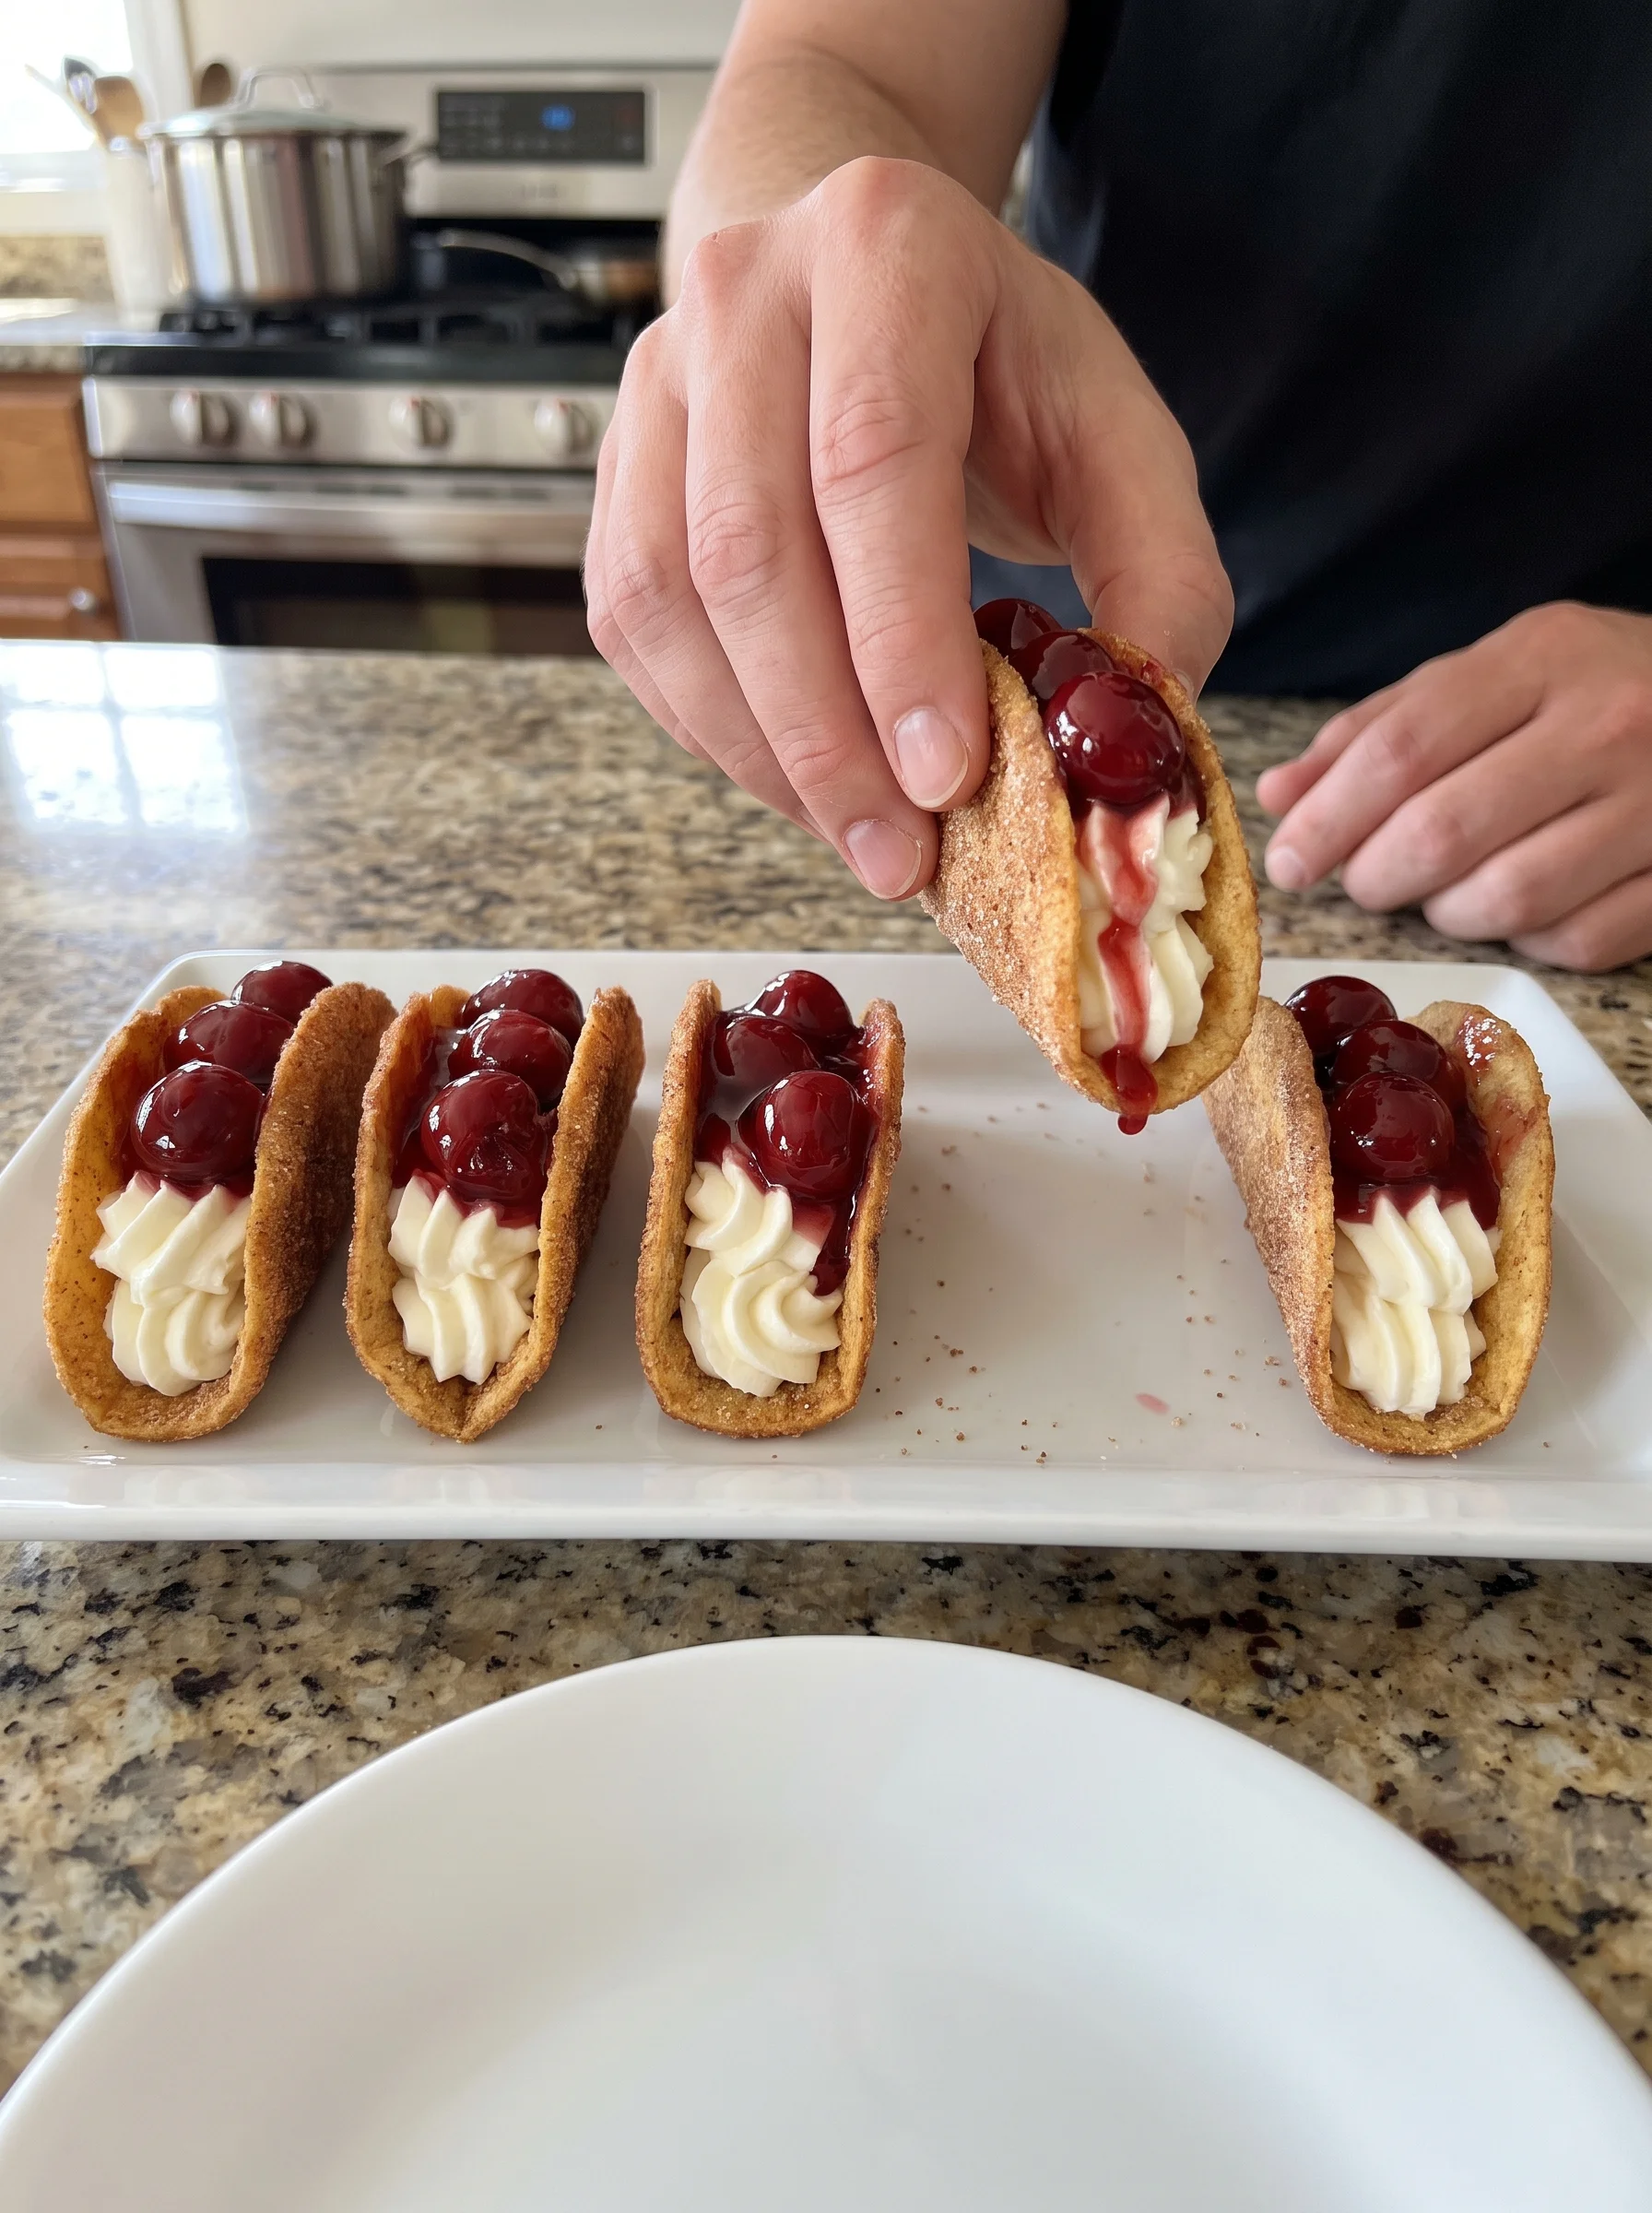
These Cherry Cheesecake Tacos are a delightful twist on traditional desserts, combining the classic flavors of cherry cheesecake in a fun and crunchy taco shell. Perfect for parties, family gatherings, or just a sweet treat at home, these tacos are sure to impress everyone with their unique presentation and irresistible taste. The creamy filling paired with the sweetness of cherries creates a dessert that’s both satisfying and memorable.
Why You’ll Love This Recipe
- Unique Flavor Combination: Experience the delightful blend of cherry and cream cheese wrapped in a crispy taco shell.
- Fun Presentation: These tacos are visually appealing, making them perfect for special occasions or festive gatherings.
- Easy to Make: With simple steps and readily available ingredients, even novice cooks can whip up this treat with ease.
- Versatile Dessert: Suitable for various events like birthday parties, potlucks, or as a fun family dessert night.
- Kid-Friendly: Kids will love the playful nature of these tacos, making it an excellent choice for family-friendly recipes.
Tools and Preparation
Before diving into the cooking process, gather your tools. Having everything ready will make your cooking experience smooth and enjoyable.
Essential Tools and Equipment
- Mixing Bowl: For combining your filling ingredients.
- Piping Bag or Ziploc Bag: To easily pipe the cheesecake filling into the taco shells.
- Cupcake Pan: Used to shape the taco shells while baking.
- Baking Sheet: For easy transfer of taco shells in and out of the oven.
- Measuring Cups and Spoons: To ensure accurate ingredient measurements.
Imgrape juiceance of Each Tool
- Mixing Bowl: A sturdy bowl is essential for mixing ingredients thoroughly without spills.
- Piping Bag or Ziploc Bag: These help you create neat lines of filling in each taco without mess.
- Cupcake Pan: This unique tool shapes the tortillas into perfect taco shells while they bake.
- Baking Sheet: Provides stability when moving hot items from the oven to cooling areas.
- Measuring Cups and Spoons: Accurate measurements are vital for achieving the perfect texture and flavor balance.
Ingredients
To make these delicious Cherry Cheesecake Tacos, you will need the following ingredients:
Filling Ingredients
- 8 ounces cream cheese, (softened)
- ⅓ cup powdered sugar
- 2 teaspoons vanilla extract
- 8 ounces Cool Whip frozen whipped topping, (thawed)
Taco Shell Ingredients
- 21 ounces cherry pie filling
- 1 cup granulated sugar
- 3 teaspoons ground cinnamon
- 18 street taco-size flour tortillas, (or cut soft taco-size tortillas to a 4-inch round with a bowl, glass, or cookie cutter)
- ½ cup butter, (melted)
How to Make Cherry Cheesecake Tacos
Step 1: Prepare Cinnamon Sugar
Combine sugar and ground cinnamon in a small bowl. Set aside for later use.
Step 2: Mix Cream Cheese Filling
In a medium mixing bowl, beat together softened cream cheese, powdered sugar, and vanilla extract until well combined. Ensure there are no lumps in your mixture.
Step 3: Add Cool Whip
Fold in thawed Cool Whip gently into the cream cheese mixture. Continue beating until smooth and fluffy.
Step 4: Prepare Piping Bag
Transfer the cheesecake filling to a piping bag fitted with Tip #1M or a gallon-sized Ziploc bag. Refrigerate it while you prepare the taco shells.
Step 5: Preheat Oven
Preheat your oven to 400°F. Line the bottom of a cupcake pan with parchment paper for easy removal later.
Step 6: Assemble Taco Shells
Brush melted butter on both sides of each tortilla. Sprinkle cinnamon sugar on both sides as well. Fold each tortilla in half like a taco and place it on an upside-down cupcake pan using its bumps to create shape.
Step 7: Bake Taco Shells
Bake in preheated oven for 8-10 minutes until shells start to brown. Allow them to cool in the pan for about 10 minutes before transferring them to a cooling rack until completely cooled.
Step 8: Fill Taco Shells
Once cooled, take your piping bag filled with cheesecake mixture and pipe a line across the center of each taco shell.
Step 9: Top with Cherries
Add 3 to 4 cherries along with some sauce from the can onto each filled taco.
Step 10: Serve Immediately
Enjoy these tasty Cherry Cheesecake Tacos right away for optimal crunchiness!
How to Serve Cherry Cheesecake Tacos
Cherry cheesecake tacos are a delightful treat that can be served in various ways to enhance their flavor and presentation. Here are some serving suggestions to elevate your dessert experience.
Garnish with Whipped Cream
- Add a dollop of whipped cream on top for extra creaminess.
- Use flavored whipped cream, like vanilla or almond, for a unique twist.
Serve with Ice Cream
- Pair each taco with a scoop of vanilla ice cream for a classic combination.
- Try pairing it with cherry or chocolate ice cream to complement the flavors.
Drizzle with Chocolate Sauce
- Drizzle warm chocolate sauce over the tacos for a rich touch.
- Sprinkle some crushed nuts on top for added texture.
Fresh Fruit Accompaniments
- Serve alongside fresh berries, such as strawberries or blueberries, for added freshness.
- A side of sliced bananas can also provide a nice contrast to the cherry flavor.
Create a Dessert Platter
- Arrange several cherry cheesecake tacos on a platter for sharing.
- Include different toppings like sprinkles, nuts, and sauces for guests to customize their tacos.
How to Perfect Cherry Cheesecake Tacos
To ensure your cherry cheesecake tacos are absolutely perfect, consider these helpful tips:
- Use Softened Cream Cheese: Make sure your cream cheese is softened before mixing. This ensures a smooth and creamy filling.
- Don’t Overbake Shells: Keep an eye on the taco shells while baking. Remove them once they start to brown to avoid becoming too hard.
- Chill the Filling: For the best texture, refrigerate the cheesecake filling before piping it into the taco shells.
- Experiment with Fillings: Feel free to try different pie fillings like blueberry or peach for variety.
- Adjust Sweetness: Taste the filling mixture and adjust powdered sugar according to your sweetness preference.
- Serve Fresh: These tacos are best served immediately after assembling. If making ahead, store components separately.
Best Side Dishes for Cherry Cheesecake Tacos
Pairing side dishes with cherry cheesecake tacos can enhance your dessert experience. Here are some tasty options:
- Chocolate-Covered Strawberries: Juicy strawberries dipped in rich chocolate add a sweet contrast.
- Fruit Salad: A refreshing mix of seasonal fruits balances the richness of the tacos.
- Mini Cheesecakes: Offer mini cheesecakes as another creamy dessert option that complements the flavors.
- Pineapple Upside-Down Cake: This moist cake brings a tropical flair that pairs well with cherries.
- Cinnamon Sugar Churros: Crispy churros dusted in cinnamon sugar add an extra crunch and sweetness.
- Coffee or Tea: Serving coffee or tea can help balance out the sweetness of the dessert and provide a comforting finish.
Common Mistakes to Avoid
When making Cherry Cheesecake Tacos, it’s easy to overlook a few key details. Here are some common mistakes to avoid for the best results:
-
Using cold cream cheese – Always ensure your cream cheese is softened before mixing. This will help create a smooth filling.
-
Skipping the cinnamon sugar coating – This step adds flavor and enhances the taco shell. Don’t skip it; brush melted butter and sprinkle generously.
-
Overbaking the taco shells – Keep an eye on the shells while baking. They should be golden brown but not burned; 8-10 minutes is ideal.
-
Not letting taco shells cool properly – Allowing the shells to cool for at least 10 minutes helps them firm up. They will be too soft if removed too soon.
-
Filling tacos too early – Fill your tacos just before serving. This prevents the shells from becoming soggy.
-
Using store-bought pie filling without checking – Ensure your cherry pie filling is of good quality. Fresh ingredients make a big difference in flavor.
Storage & Reheating Instructions
Proper storage and reheating can keep your Cherry Cheesecake Tacos delicious longer.
Refrigerating
- Store leftover tacos in an airtight container.
- Place parchment paper between layers to prevent sticking.
- Consume within 2-3 days for optimal freshness.
Freezing
- Wrap individual tacos tightly in plastic wrap.
- Place wrapped tacos in a freezer bag or container.
- Use within one month for best quality.
Reheating
Reheat with care to maintain texture and flavor:
-
Oven – Preheat to 350°F. Place tacos on a baking sheet and warm for about 5-7 minutes until heated through.
-
Microwave – Heat on medium power for 15-20 seconds per taco. Check frequently to avoid overheating.
-
Stovetop – Warm in a skillet over low heat, covering with a lid for even heating, for 2-3 minutes on each side.
Frequently Asked Questions
Here are some frequently asked questions about Cherry Cheesecake Tacos that may help clarify any doubts:
Can I make Cherry Cheesecake Tacos ahead of time?
Yes, you can prepare the cheesecake filling and taco shells separately ahead of time. Assemble them just before serving for the best texture.
What can I substitute for Cool Whip?
You can use homemade whipped cream instead of Cool Whip. Just beat heavy cream with sugar until stiff peaks form.
Can I use different fruit fillings?
Absolutely! You can customize your tacos with various fruit fillings like strawberry or blueberry for a unique twist on this recipe.
How do I ensure my taco shells stay crispy?
Make sure to let your taco shells cool completely after baking before adding the filling. This will help retain their crunchiness.
Are Cherry Cheesecake Tacos gluten-free?
To make gluten-free Cherry Cheesecake Tacos, use gluten-free tortillas instead of regular flour tortillas.
How many servings does this recipe yield?
This recipe yields approximately 18 servings, making it perfect for parties or gatherings!
Final Thoughts
Cherry Cheesecake Tacos are not only delightful but also versatile. Their perfect blend of crispy shell and creamy filling makes them an appealing dessert or snack option for any occasion. Feel free to customize these tacos with different fruits or toppings to suit your taste preferences. Give this fun recipe a try, and enjoy a sweet twist on traditional desserts!

Cherry Cheesecake Tacos
- Total Time: 30 minutes
- Yield: 18 servings 1x
Description
Indulge in the delightful world of Cherry Cheesecake Tacos, a fun and creative twist on traditional desserts! These tacos combine the classic flavors of creamy cheesecake and sweet cherries, all nestled in a crispy taco shell. Perfect for parties or just a cozy night at home, they are visually stunning and incredibly easy to make. With simple ingredients and straightforward steps, even novice cooks can impress their family and friends with this unique dessert. Each bite offers a satisfying crunch followed by a rich, creamy filling that makes these tacos unforgettable. Whether you’re hosting a gathering or treating yourself to something special, Cherry Cheesecake Tacos promise to elevate any occasion.
Ingredients
- 8 ounces cream cheese (softened)
- ⅓ cup powdered sugar
- 2 teaspoons vanilla extract
- 8 ounces Cool Whip frozen whipped topping (thawed)
- 21 ounces cherry pie filling
- 1 cup granulated sugar
- 3 teaspoons ground cinnamon
- 18 street taco-size flour tortillas
- ½ cup butter (melted)
Instructions
- Preheat your oven to 400°F (200°C) and line the bottom of a cupcake pan with parchment paper.
- In a small bowl, mix together the granulated sugar and ground cinnamon; set aside.
- In a medium mixing bowl, beat softened cream cheese, powdered sugar, and vanilla extract until smooth.
- Gently fold in thawed Cool Whip until fully combined.
- Transfer the cheesecake mixture to a piping bag or Ziploc bag and refrigerate.
- Brush melted butter on both sides of each tortilla and sprinkle with cinnamon sugar.
- Fold each tortilla in half and place them on an upside-down cupcake pan; bake for 8-10 minutes until golden brown.
- Allow taco shells to cool before piping the cheesecake filling into each shell.
- Top filled tacos with cherry pie filling and serve immediately for optimal crunchiness.
- Prep Time: 20 minutes
- Cook Time: 10 minutes
- Category: Dessert
- Method: Baking
- Cuisine: American
Nutrition
- Serving Size: 1 taco (45g)
- Calories: 220
- Sugar: 15g
- Sodium: 150mg
- Fat: 10g
- Saturated Fat: 6g
- Unsaturated Fat: 3g
- Trans Fat: 0g
- Carbohydrates: 28g
- Fiber: 1g
- Protein: 2g
- Cholesterol: 25mg