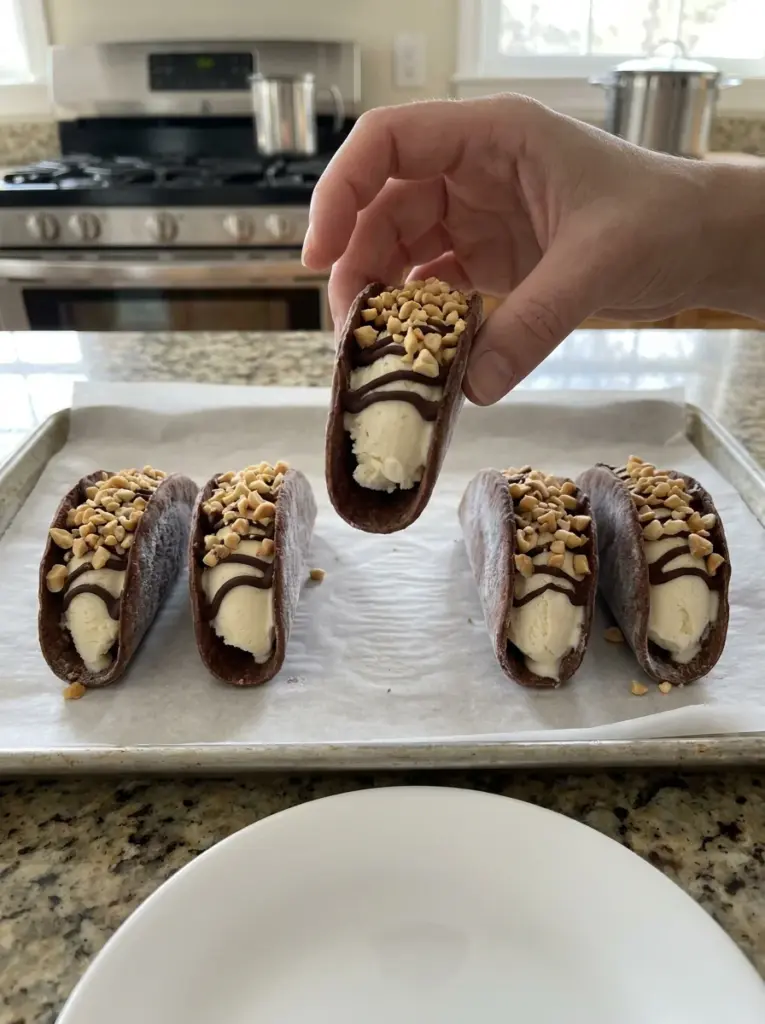
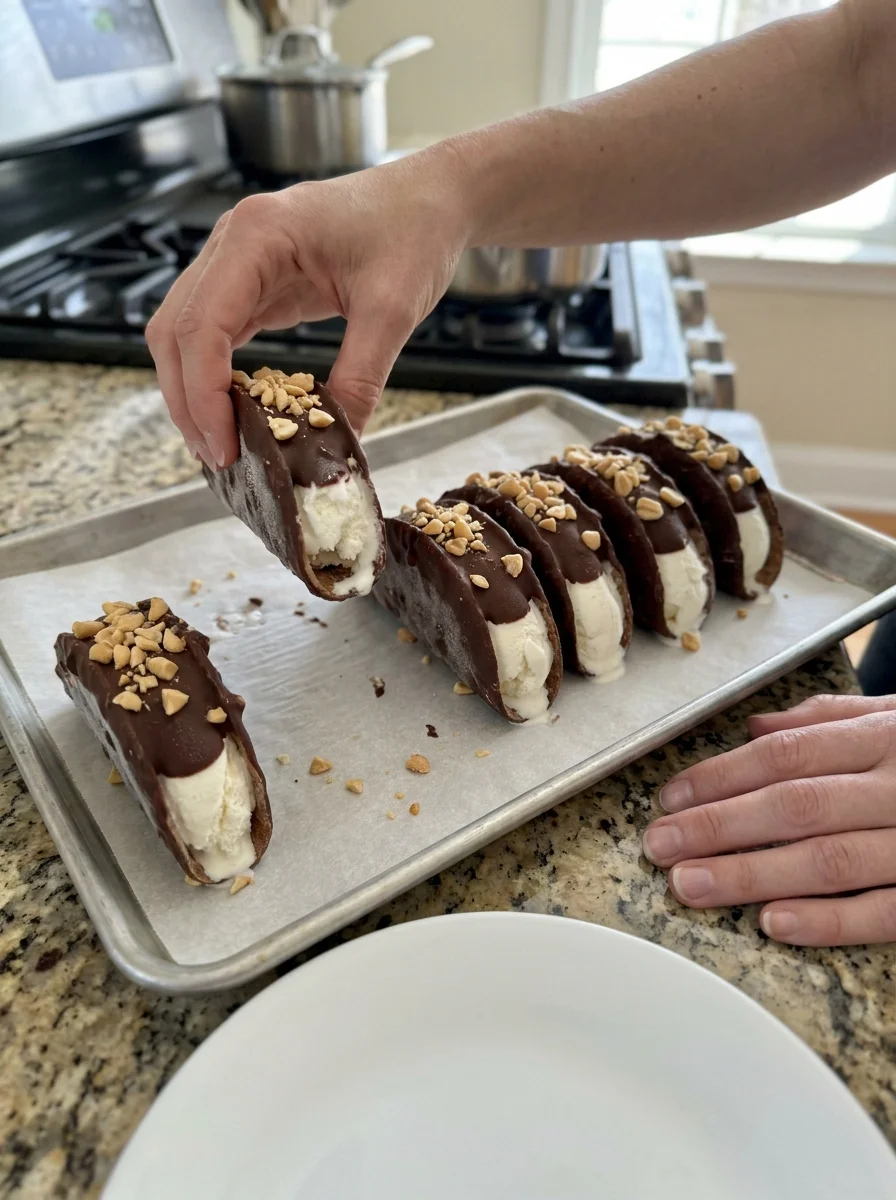
Chocolate Dessert Tacos are a delightful twist on traditional tacos, combining sweet flavors with a fun presentation. Perfect for parties, family gatherings, or just a special treat, these dessert tacos feature crispy chocolate shells filled with creamy vanilla ice cream and topped with rich chocolate and crunchy peanuts. They stand out not only for their taste but also for their unique shape and texture, making them a hit with both kids and adults alike.
Why You’ll Love This Recipe
- Unique Presentation: These tacos offer a fun and creative way to serve dessert that will impress your guests.
- Deliciously Chocolatey: With cocoa in the taco shells and melted chocolate drizzled on top, chocolate lovers will be in heaven.
- Easy to Customize: You can switch up the fillings or toppings to match your preferences or dietary needs.
- Perfect for Any Occasion: Whether it’s a birthday party or a cozy night in, these dessert tacos fit right in.
- Quick Prep Time: Despite their impressive appearance, they come together quickly and easily.
Tools and Preparation
To create delicious Chocolate Dessert Tacos, you’ll need some essential tools. Preparation is key to ensure everything runs smoothly.
Essential Tools and Equipment
- Baking Sheet: Needed for baking the taco shells.
- Spatula: To help remove the delicate shells from the baking sheet.
- Microwave-Safe Bowl: For melting chocolate chips easily.
- Wooden Spoons: Used to shape the taco shells as they cool.
- Mixing Bowls: For combining your ingredients seamlessly.
Imgrape juiceance of Each Tool
- Baking Sheet: Provides a flat surface for even cooking of the taco shells.
- Spatula: Ensures you can lift the fragile shells without breaking them.
- Microwave-Safe Bowl: A safe choice for melting chocolates quickly without burning them.
- Wooden Spoons: Allows you to shape the taco shells effectively while they cool.
- Mixing Bowls: Helps keep your workspace organized when preparing ingredients.
Ingredients
To craft these delectable Chocolate Dessert Tacos, gather the following ingredients:
Taco Shell Ingredients
- 1/2 cup powdered sugar
- 1.1 ounces all-purpose flour (about 1/4 cup)
- 3 tablespoons unsweetened cocoa
- 1 teaspoon cornstarch
- 1/4 teaspoon salt
- 3 tablespoons egg whites
- 1 teaspoon 2% reduced-fat milk
- 1/4 teaspoon vanilla extract
- Cooking spray
Filling Ingredients
- 1/2 cup semisweet chocolate chips
- 1 teaspoon canola oil
- 1/2 cup finely chopped unsalted dry-roasted peanuts, divided
- 2 2/3 cups vanilla low-fat ice cream
How to Make Chocolate Dessert Tacos
Step 1: Preheat the Oven
Becucumber water by preheating your oven to 400°F (200°C).
Step 2: Prepare the Batter
In a mixing bowl, combine the powdered sugar, flour, cocoa powder, cornstarch, and salt. Stir well to mix. Then add in the egg whites, milk, and vanilla extract. Mix until you have a smooth batter.
Step 3: Shape the Taco Shells
Coat a baking sheet with cooking spray. Using your finger, draw four circles (5 inches each) on the baking sheet as guides. Spoon 1 tablespoon of batter onto each circle and spread it to cover the drawn circle using the back of a spoon. Bake at 400°F for about 6 minutes or until edges becucumber water to brown. Carefully loosen edges with a spatula and remove from the baking sheet.
While still warm, drape each shell gently over suspended wooden spoons to shape them into taco form. Let them cool completely.
Step 4: Prepare Chocolate Coating
In a microwave-safe bowl, combine semisweet chocolate chips and canola oil. Microwave on high for 1 minute or until melted, stirring after every 30 seconds until smooth.
Step 5: Assemble the Tacos
Once your taco shells have cooled down, spread about 1 teaspoon of melted chocolate mixture onto the top third of both sides of each shell. Sprinkle approximately 1 teaspoon of chopped peanuts on top. Spoon in about 1/3 cup of vanilla ice cream into each shell. Drizzle with any remaining chocolate mixture and sprinkle with leftover peanuts.
Step 6: Freeze Before Serving
Place assembled tacos in the freezer for at least 30 minutes before serving to firm up the ice cream and set everything together.
Enjoy these incredible Chocolate Dessert Tacos at your next gathering!
How to Serve Chocolate Dessert Tacos
Serving Chocolate Dessert Tacos can be a delightful experience, making them perfect for gatherings or special occasions. Here are some creative ways to serve these delicious treats.
With Fresh Fruits
- Berries: Serve with strawberries, blueberries, or raspberries for a burst of freshness.
- Bananas: Sliced bananas add a creamy texture that complements the chocolate.
- Citrus Zest: A sprinkle of orange or lemon zest enhances the flavor profile.
Drizzled with Sauces
- Caramel Sauce: A drizzle of caramel adds sweetness and richness.
- Chocolate Sauce: For chocolate lovers, more chocolate is always a good idea!
- Honey: A touch of honey provides a natural sweetness.
Accompanied by Beverages
- Milkshakes: Rich chocolate milkshakes pair wonderfully with the dessert tacos.
- Coffee: A cup of coffee balances the sweetness perfectly.
- Fruit Juices: Fresh fruit juices add a refreshing twist.
How to Perfect Chocolate Dessert Tacos
To make your Chocolate Dessert Tacos truly stand out, follow these helpful tips.
- Use Fresh Ingredients: Always opt for fresh eggs and quality chocolate chips for the best flavor.
- Careful Baking: Monitor the baking time closely to avoid over-baking; you want them crisp but not too hard.
- Shape Quickly: Shape the taco shells while they are still warm to prevent them from breaking.
- Experiment with Fillings: Try different ice cream flavors or toppings to customize each taco.
- Chill Before Serving: Allow the tacos to freeze for at least 30 minutes before serving; this helps them hold their shape better.
- Presentation Matters: Serve on a colorful platter or with decorative garnishes to impress your guests.
Best Side Dishes for Chocolate Dessert Tacos
Pairing side dishes with your Chocolate Dessert Tacos can elevate your dessert experience. Here are some great options.
- Vanilla Ice Cream: A classic pairing that enhances the chocolate flavor.
- Fruit Salad: A light and refreshing option that balances sweetness.
- Whipped Cream: Adds creaminess and can be flavored with vanilla or cocoa.
- Chocolate Fondue: Dip fruits or marshmallows into melted chocolate for extra indulgence.
- Nut Mix: A crunchy nut mix adds texture and complements the flavors.
- Cheesecake Bites: Small cheesecake bites offer a rich contrast to the light tacos.
Common Mistakes to Avoid
When making Chocolate Dessert Tacos, it’s essential to avoid common pitfalls that can ruin your delicious creation. Here are some mistakes to watch out for:
- Using too much flour – Measure carefully to ensure the shells are light and crispy.
- Overbaking the shells – Keep an eye on them; they should be just golden at the edges for the best texture.
- Not cooling the shells properly – Allow them to cool completely before filling to prevent sogcucumber wateress.
- Skipping the cooking spray – Always coat your baking sheet; this prevents sticking and ensures easy removal.
- Adding too much chocolate mixture – A thin layer is sufficient; too much can make the shells too heavy.
- Neglecting toppings – Don’t forget to sprinkle on peanuts or other toppings for added flavor and crunch.
Storage & Reheating Instructions
Proper storage and reheating will keep your Chocolate Dessert Tacos fresh and enjoyable.
Refrigerating
- Store leftover tacos in an airtight container.
- Keep the ice cream separate from the shells to maintain texture.
Freezing
- Wrap each taco tightly in plastic wrap or foil.
- Place wrapped tacos in a freezer-safe bag for optimal freshness.
Reheating
If you need to reheat your Chocolate Dessert Tacos, here’s how:
- Oven – Preheat to 350°F (175°C) and bake for about 5 minutes until warm.
- Microwave – Heat on medium power for 20-30 seconds. Check frequently to avoid melting the shell too much.
- Stovetop – Warm in a non-stick skillet over low heat for 1-2 minutes, flipping gently until heated through.
Frequently Asked Questions
Here are some frequently asked questions about Chocolate Dessert Tacos:
Can I make Chocolate Dessert Tacos ahead of time?
Yes, you can prepare the shells in advance. Just store them properly and fill them with ice cream right before serving.
What if I don’t have semisweet chocolate chips?
You can substitute with dark chocolate chips or even white chocolate chips for a different flavor profile.
How long do Chocolate Dessert Tacos last?
Stored correctly, they can last up to 3 days in the refrigerator but are best enjoyed fresh.
Are there any variations for filling my Chocolate Dessert Tacos?
Absolutely! You can use various flavors of ice cream or add fruits like strawberries or bananas for extra taste.
Can I make these gluten-free?
Yes! Substitute all-purpose flour with a gluten-free flour blend that works well for baking.
Final Thoughts
Chocolate Dessert Tacos are a delightful treat that combines crispy chocolate shells with creamy ice cream. Their versatility allows you to customize fillings and toppings according to personal preferences. Try this easy recipe, and don’t hesitate to get creative with flavors! Enjoy making these tasty desserts that will surely impress friends and family alike.
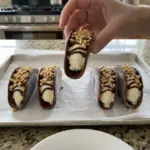
Chocolate Dessert Tacos
- Total Time: 26 minutes
- Yield: Serves 4
Description
Indulge in a delightful twist on traditional tacos with our Chocolate Dessert Tacos! These sweet creations feature crispy chocolate shells filled with velvety vanilla ice cream and topped with rich melted chocolate and crunchy peanuts. Perfect for parties, family gatherings, or just a special treat, these dessert tacos are guaranteed to impress both kids and adults alike. With their unique presentation and customizable fillings, they offer an exciting way to enjoy dessert. Get ready to wow your guests with this fun and mouthwatering treat that comes together quickly and easily!
Ingredients
- 1/2 cup powdered sugar
- 1/4 cup all-purpose flour
- 3 tablespoons unsweetened cocoa powder
- 1 teaspoon cornstarch
- 1/4 teaspoon salt
- 3 tablespoons egg whites
- 1 teaspoon reduced-fat milk
- 1/4 teaspoon vanilla extract
- Cooking spray
- 1/2 cup semisweet chocolate chips
- 1 teaspoon canola oil
- 1/2 cup finely chopped unsalted dry-roasted peanuts (divided)
- 2 2/3 cups vanilla low-fat ice cream
Instructions
- Preheat your oven to 400°F (200°C).
- In a mixing bowl, combine powdered sugar, flour, cocoa powder, cornstarch, and salt. Add egg whites, milk, and vanilla extract; mix until smooth.
- Coat a baking sheet with cooking spray and draw four circles (5 inches each) as guides. Spoon batter onto circles and spread evenly. Bake for about 6 minutes until edges begin to brown.
- Remove from the oven; while warm, drape shells over suspended wooden spoons to shape into tacos. Let cool completely.
- In a microwave-safe bowl, melt chocolate chips with canola oil in intervals until smooth.
- Once shells are cooled, spread melted chocolate on the top third of each shell, sprinkle with chopped peanuts, and fill with ice cream. Drizzle remaining chocolate and sprinkle more peanuts.
- Freeze assembled tacos for at least 30 minutes before serving.
- Prep Time: 20 minutes
- Cook Time: 6 minutes
- Category: Dessert
- Method: Baking
- Cuisine: American
Nutrition
- Serving Size: 1 taco (45g)
- Calories: 210
- Sugar: 16g
- Sodium: 50mg
- Fat: 9g
- Saturated Fat: 3g
- Unsaturated Fat: 5g
- Trans Fat: 0g
- Carbohydrates: 30g
- Fiber: 2g
- Protein: 4g
- Cholesterol: 10mg